27 Hibiscus Flower Nail Art Ideas for a Tropical Vibe | Polish and Pearls
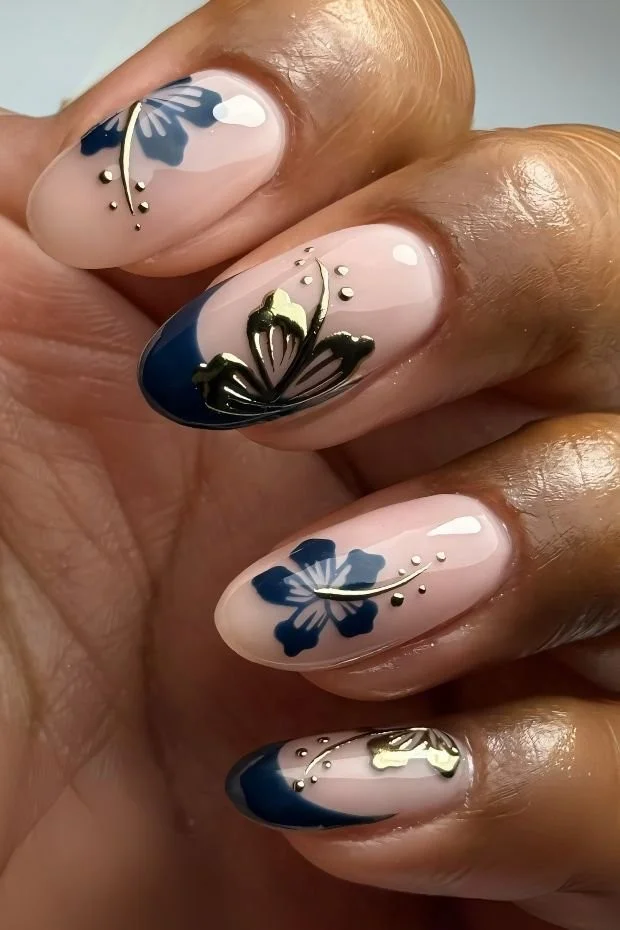
why make this recipe Hibiscus flower nail art is a fun way to bring a bit of the tropics to your look. These designs are bright, cheerful, and perfect for any occasion, whether you’re going to a beach party or just want to brighten up your everyday style. Creating nail art with hibiscus flowers is…
why make this recipe
Hibiscus flower nail art is a fun way to bring a bit of the tropics to your look. These designs are bright, cheerful, and perfect for any occasion, whether you’re going to a beach party or just want to brighten up your everyday style. Creating nail art with hibiscus flowers is simple and allows you to express your creativity. Plus, it makes for a fresh and lovely addition to your beauty routine.
how to make Hibiscus Flower Nail Art
Ingredients:
- Nail polish in various colors (red, pink, green, and yellow)
- Base coat
- Top coat
- Nail art tools (dotting tools, brushes)
- Sponge
- Nail striping tape (optional)
- Nail primer
- Hibiscus flower stickers (optional)
Directions:
- Start by cleaning your nails. Push back your cuticles and remove any old polish.
- Apply a nail primer to help the polish stick better.
- Once the nails are prepped, apply a base coat to all nails. Let it dry completely.
- Choose a base color for your hibiscus flower design. This could be a bright shade like white or pale pink. Apply two coats for full coverage, letting each coat dry in between.
- To create hibiscus flowers, use a dotting tool or a fine brush. Dip it into a different color polish, like deep red or bright pink.
- Start with five dots to form the petals of the flower. Arrange them in a circular pattern.
- Use green polish and a fine brush to draw leaves next to the flowers. Make sure to let your design dry before moving on to the next step.
- If using stickers, you can apply them now for an easy hibiscus look.
- Apply a top coat to seal your design and add shine.
- Clean any excess polish around the nails with a brush dipped in acetone.
- Let everything dry completely before handling anything.
how to serve Hibiscus Flower Nail Art
Hibiscus flower nail art is perfect for showing off during special occasions or summer events. You can share your designs on social media or with friends, and they make great conversation starters. For the ultimate tropical vibe, pair your nails with colorful accessories or outfits.
how to store Hibiscus Flower Nail Art
You can’t really store nail art, but you can maintain your designs by applying a thin layer of top coat every few days. This helps to preserve the look and adds extra shine. When it’s time to remove the nail art, use an acetone-based remover and follow the regular nail care routine afterward.
tips to make Hibiscus Flower Nail Art
- Use a quality base and top coat to make your nail art last longer.
- Don’t rush the drying time; it’s essential for the longevity of your design.
- Experiment with different color combinations for your hibiscus flowers.
- If you are new to nail art, practice on paper before trying on your nails.
variation
For a twist on the classic hibiscus flower design, try using a matte top coat instead of a glossy one. You can also play with neon colors or metallic shades for a more modern look. Adding glitter to your nail art can give it an extra sparkle perfect for a night out.
FAQs
1. How long does nail art typically last?
Nail art can last from a few days to a week, depending on the quality of the nail polish used and how well you take care of your nails.
2. Can I use regular nail polish for nail art?
Yes, you can use regular nail polish for nail art, but nail art-specific polishes may provide better results and more vibrant colors.
3. Do I need special tools for nail art?
While there are many tools that can make nail art easier, you can get started with simple items you already have, like a toothpick or a fine brush.