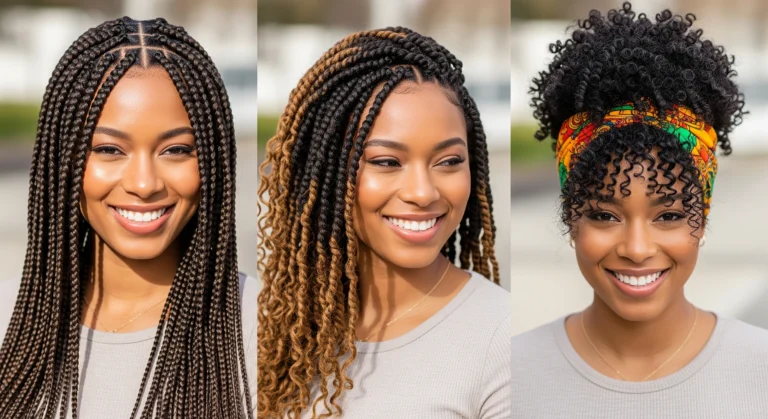

Cute hairstyles for school: 5 Easy, Viral Styles to Try
Discover the 5 best cute hairstyles for school that protect hair health. Master the viral bubble braid with our expert, data-driven trichology guide.
Introduction
Did you know that searches for “Y2K hair trends” and efficient morning routines have spiked over 200% on TikTok this semester? Students are craving looks that deliver maximum impact with minimal effort, saving precious sleep time without sacrificing style. However, the search for cute hairstyles for school often leads to heat-heavy routines that compromise your hair’s structural integrity.
As a trichology-focused stylist, I know that the morning rush is the leading cause of mechanical damage and cuticle disruption. You need a style that protects your cortex while keeping you on-trend. In this guide, we are mastering the “Bubble Braid Pony”—a versatile look that works on day-old hair, reduces frizz, and fits perfectly into the “Clean Girl” or “Eclectic Grandpa” aesthetic. Whether you have fine Type 1 strands or high-density Type 4 coils, we’re going to elevate your morning routine with science-backed styling.
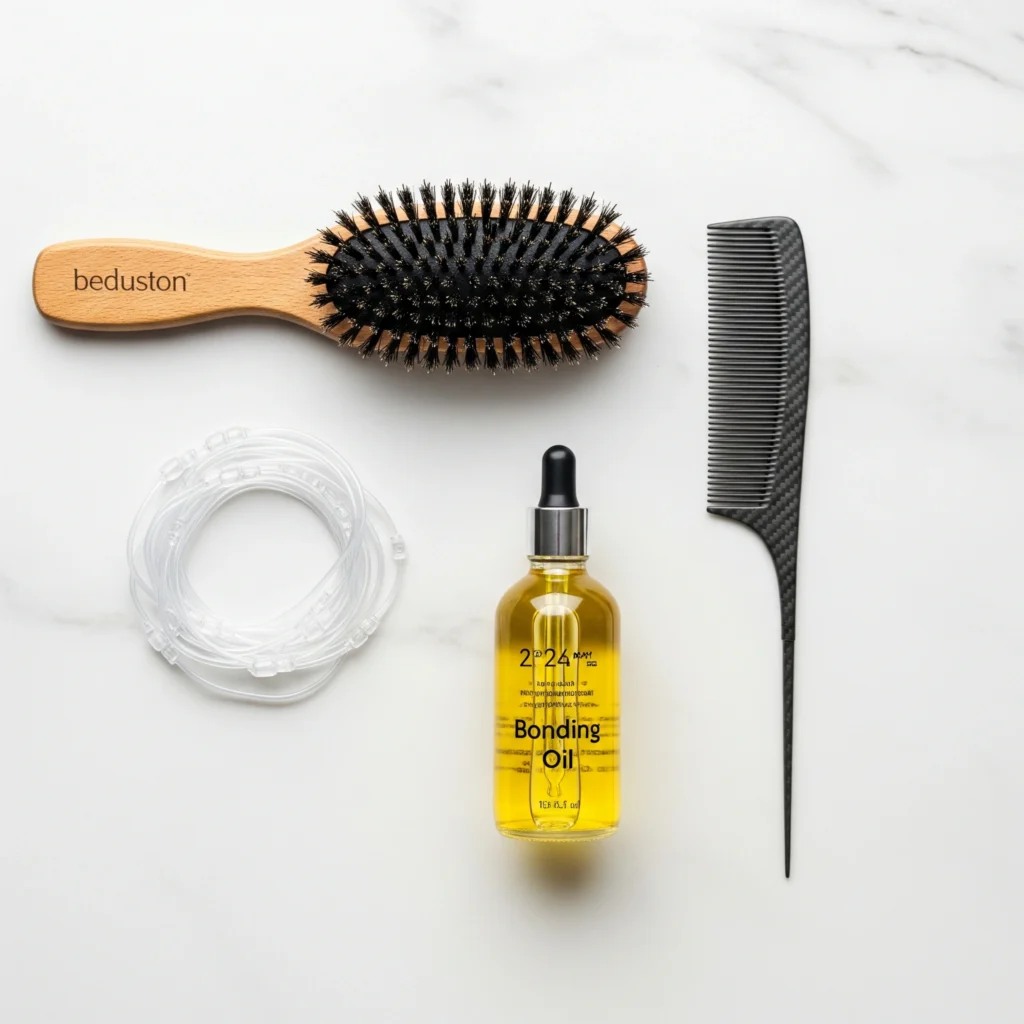
Essential Toolkit & Product Breakdown
To achieve a style that withstands an eight-hour school day and gym class humidity, your toolkit must be intentional. We are looking for tools that minimize friction and products that respect your hair’s pH balance.
The Hardware (Tools)
- The Brush: A Boar Bristle Brush (or a high-quality synthetic alternative) to assist with sebum distribution from scalp to mid-lengths.
- The Anchor: Snag-free clear elastics or silk-wrapped micro-scrunchies. Trichology Tip: Standard rubber bands cause shearing of the hair shaft.
- The Detailer: A Rat-tail comb (carbon fiber is best to reduce static) for precision parting.
The Software (Products)
1. Prep Products (The Foundation):
- Detangler/Leave-In: Look for ingredients like Aloe or Glycerin for moisture retention.
- Heat Protectant: If you plan to add waves to the ends. You need a polymer barrier to protect keratin bonds up to 450°F.
2. Finishing Products (The Polish):
- Styling Cream/Gel: Essential for the “sleek” base.
- Bonding Oil: For sealing the cuticle and adding mirror-like shine.
Pro vs. Budget Breakdown
- Pro Investment:Mason Pearson Brush (
175)∗∗+∗∗K18MolecularRepairOil(175)∗∗+∗∗K18MolecularRepairOil(65).- Why: The specific bristle density exfoliates the scalp while polishing the shaft; the peptide oil repairs damage inside the cortex.
- Budget Hack:Wet Brush Shine (
15)∗∗+∗∗JojobaOil(15)∗∗+∗∗JojobaOil(10).- Why: Jojoba mimics natural human sebum, providing an affordable, bio-compatible seal without the price tag.
Time Commitment & Hair Prep
Total Time:
- Fine/Thin Hair: 5–7 minutes.
- Thick/Coarse Hair: 8–12 minutes.
- Type 3/4 Curls & Coils: 12–15 minutes (allowing for smoothing time).
The “Canvas” (Preparation):
This is explicitly a Day 2 or Day 3 hairstyle. Freshly washed hair often lacks the “grip” required for structural bubbles. The natural oils present on the scalp by day two help anchor the style.
- Pre-Style State: Hair should be 90% to 100% dry. Do not attempt this wet unless you are using a specific wet-styling gel technique for curly hair to lock in the hydration.
Skill Level: Novice-Intermediate. (If you can tie a shoelace, you can do this).
Step-by-Step Styling Protocol
Step 1: Sectioning and Sebum Distribution
Begin by brushing your hair from ends to roots to remove tangles without snapping the fiber. Once detangled, brush from the root downwards to distribute your scalp’s natural sebum. This lowers the porosity of the mid-lengths naturally. Use your rat-tail comb to carve out your desired parting—center parts are trending for a symmetric profile.
- Fine Hair Adjustment: Spray a dry texture spray at the roots before brushing to create volume and grit.
- Type 3/4 Adjustment: Apply a water-based leave-in followed by an edge control gel to the perimeter. Use a firm grooming brush to smooth the hair into your hand for a snag-free base.
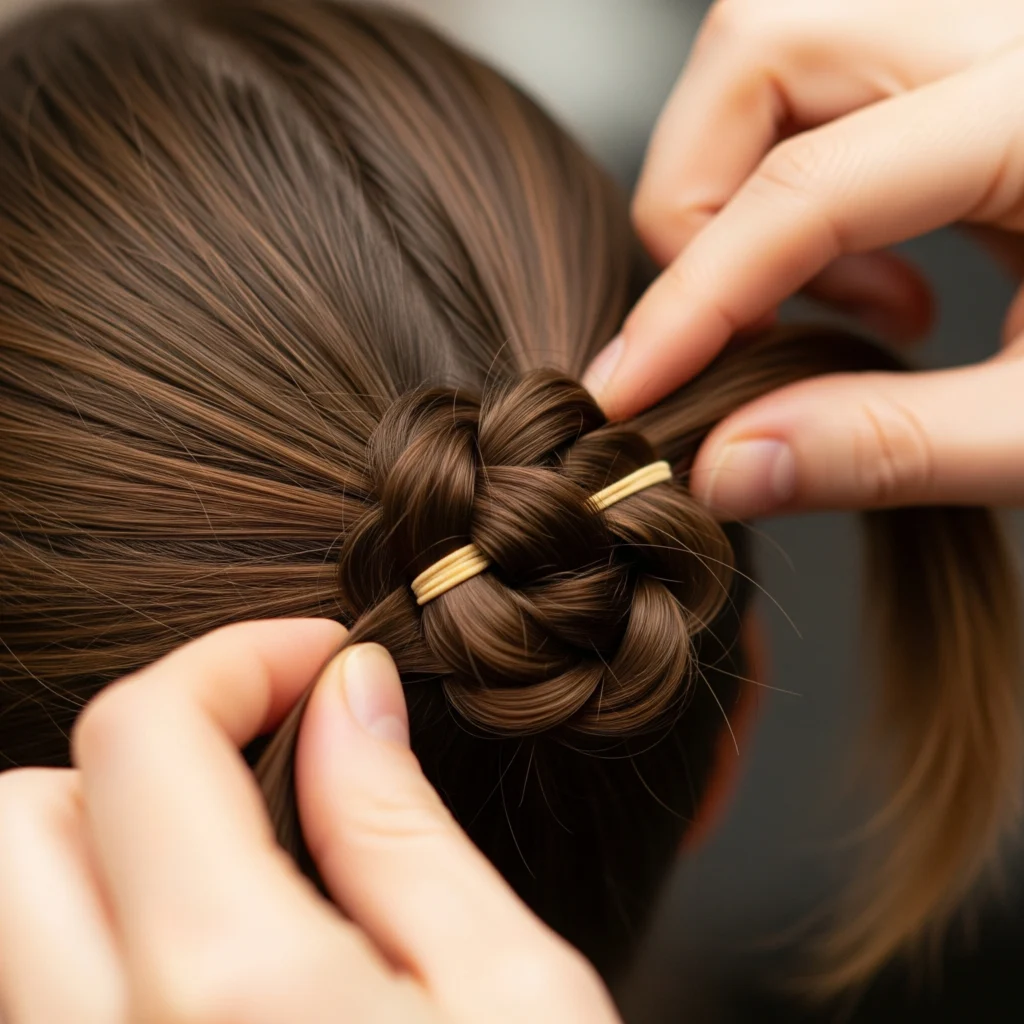
Step 2: The Structural Anchor
Gather your hair into your preferred base ponytail (high cranial for a lifted look, or nape-level for a chic vibe). Secure with a fabric-wrapped hair tie to avoid tension headaches.
- Stylist Secret: Tilt your chin up towards the ceiling while gathering the ponytail. When you lower your head, the hair at the nape creates a tighter, cleaner line without sagging.
Step 3: Volumizing the Bubbles
Move 1.5 to 2 inches down from the base elastic and wrap a clear elastic band around the tail. Now, the magic happens: hold the elastic with one hand, and with the other, gently pinch and pull the hair between the two elastics outward.
- The Motion: Think “fanning,” not pulling. You are expanding the radius of the section to create that bulbous shape.
- Texture Adjustment:
- Straight/Wavy: Pull aggressively for a fluffy, ethereal look.
- Coily/Curly: Pull gently to maintain curl definition within the bubble without causing frizz halos.
Step 4: Repeating and Sealing
Repeat the process down the length of the ponytail. Leave at least 2 inches of hair straight at the very ends. Take a drop of bonding oil, emulsify it in your palms, and “glide” it over the bubbles to compress flyaways.
- Stylist Secret: If your ends look dry, blast them with the Cool Shot button on your dryer for 10 seconds. Cold air contracts the cuticle scales, locking in a glassy finish.
The Science of Hair Health
Why do I recommend this as one of the best cute hairstyles for school? It comes down to physics and biology.
- Tension Reduction: Unlike tight cornrows or heavy updos, bubble braids distribute weight evenly across the shaft. The “bubbles” allow the hair fiber to expand naturally, reducing the risk of traction alopecia (hair loss due to pulling) which can occur even in young students.
- Cuticle Preservation: By containing the hair in elastics, you reduce the surface area exposed to environmental friction (like rubbing against backpacks or chair backs). This protects the cuticle layers—the hair’s armor—from mechanical wear and tear.
- Sebum Management: Since this style relies on products or natural oils to slick down the root, it mimics a “protective style.” The oils create an occlusive layer that seals hydration into the cortex, preventing the trans-epidermal water loss (TEWL) that leads to dryness in air-conditioned classrooms.

Customizations for Hair Type & Length
No two heads of hair have the same biological makeup. Here is how to customize this look:
Length Adaptations
- Short Hair (Bobs/Lobs): You might not have the length for a full ponytail. Instead, do “Front Framing Bubbles.” Take two small sections at the front hairline and create mini-bubbles framing the face.
- Long Layers: If your layers poke out of the bubbles, don’t fight it. Use a wax stick to smooth them down, or embrace the “tousled grit” aesthetic by letting them stick out for a punk-chic vibe.
Porosity Modifications
- High Porosity (Bleached/Damaged): Your hair drinks moisture but loses it fast. Before styling, apply a heavy cream-based leave-in. You need the “fillers” in the cream to give your hair strands uniformity so the bubbles look full, not stringy.
- Low Porosity (Virgin/Shiny): Products sit on top of your hair. Avoid heavy waxes. Stick to lightweight sprays and minimal oil to ensure the elastics don’t slide right off the hair shaft.
“Complete The Look” Pairings
As a celebrity stylist, I know hair doesn’t exist in a vacuum. It interacts with your bone structure and your fashion.
- Necklines: Because this style pulls hair back or down the spine, it pairs beautifully with Mock Necks or Oversized Hoodies. The clean hair silhouette balances the bulk of the fabric.
- Makeup: Lean into the “fresh” aesthetic. Think brushed-up soap brows and a tinted lip oil. Since the hair is structured, keep the makeup dewy and diffused.
- Accessory Tech: Add small ribbon bows to each elastic for a “Coquette” finish, or use metal cuffs for an industrial edge.
Common Styling Mistakes
Even the best cute hairstyles for school can fail if the execution ignores hair physics.
- The “Elastic Snap”:
- Problem: Pulling elastics out at the end of the day, shredding the hair cuticle.
- Solution: Never pull them out. Use a tiny pair of elastic cutters (or carefully use nail scissors) to snip the bands. This saves your hair from significant mechanical breakage.
- Product Overload:
- Problem: Using heavy gels on roots creates buildup that blocks the follicle.
- Solution: Focus thick products on the mid-lengths. Use lightweight mousses or sprays near the scalp to maintain volume.
- Frying the Ends:
- Problem: Flat ironing the ends of the pony every single morning.
- Solution: Use heatless methods (like a roller) the night before, or rely on a finishing serum to smooth ends rather than thermal tools.

The “Refresh” & Sleep Routine
One of the best parts of this look? It can be a multi-day style if you manage your sleep hygiene.
The Night Protocol:
- Protection: Do not sleep directly on the bubbles. I recommend a silk or satin bonnet. The smooth surface reduces friction, preventing the “frizz halo.”
- The Pillow: If you don’t wear a bonnet, a silk pillowcase is non-negotiable for preserving the hair’s lipid barrier.
The Morning Refresh:
- Revive: The bubbles might be flattened. Gently re-fluff them by pinching and pulling again.
- Smooth: Apply a pea-sized amount of serum to your fingertips and re-smooth the crown.
- Sanitize: If your roots feel oily on Day 3, apply a non-aerosol dry powder (better for the environment and scalp microbiome) to absorb excess lipid production without dulling the hair’s shine.
Conclusion
Finding cute hairstyles for school isn’t just about vanity; it’s about efficient self-expression that honors your hair’s biological needs. The Bubble Pony offers a perfect synthesis of style and science—low tension to protect the follicle, reduced mechanical damage, and high-impact aesthetics. By understanding porosity and using the right tools, you transform a daily chore into a ritual of care.
CTA: Tried this bubble braid variation? I want to see your results and know your hair texture! Drop a comment below with your hair type (e.g., 2B, 4C) and how the style held up, or tag our blog on Instagram for a feature!
FAQs
Q1: Will using elastics every day damage my hair?
A: If used incorrectly, yes. Rubber creates friction that wears down the cuticle. Always use coated, snag-free elastics or silk ties, and never pull them out—cut them out to preserve the integrity of the cortex.
Q2: Can I do this style on curly hair without straightening it first?
A: Absolutely. In fact, textured hair holds the “bubble” shape better due to the natural friction of the strands. It highlights the dimensional coil pattern within the shape, creating a stunning, volumetric look.
Q3: My bubbles always go flat after an hour. Why?
A: This is likely a lack of “grip.” Your hair might be too clean (smooth cuticle) or too fine. Use a texturizing spray or dry shampoo on the length of the ponytail before adding the elastics to increase friction between the hairs, ensuring the shape holds.
Q4: Is this suitable for damaged or bleached hair?
A: Yes, it acts as a protective style. By binding the hair, you reduce tangling and breakage. However, load up on a bond-building leave-in conditioner before styling to treat the hair while you wear it.