tinkerbell nails 10 Amazing Styles for a Cute Fairy Look
Get inspired by 10 amazing tinkerbell nails styles for a cute fairy look. Easy tutorials and design ideas to create magical nail art at home.

Have you ever wondered how to transform your nails into a magical portal straight from Pixie Hollow? Disney fairy nail art offers an enchanting way to bring the whimsical spirit of Tinkerbell to your fingertips, creating a look that’s both playful and sophisticated.
Tinkerbell nails have become a stunning trend among Disney enthusiasts and nail art lovers. These designs capture the essence of magical transformation, blending delicate fairy aesthetics with creative nail techniques that range from subtle shimmer to elaborate character portraits.
Whether you’re a nail art beginner or a seasoned pro, these Disney fairy nail art styles will inspire you to unleash your inner pixie. From sparkling green designs to intricate wing-inspired accents, you’ll discover ten amazing ways to make your nails tell a magical story.
Key Takeaways
- Explore versatile Tinkerbell nail design styles
- Learn techniques for creating magical nail art
- Discover how to incorporate Disney fairy themes
- Find designs suitable for all skill levels
- Understand the color palette of Pixie Hollow
Why Tinkerbell-Inspired Manicures Are Trending

Magical manicure ideas have taken the beauty world by storm, with Tinkerbell nails emerging as a standout trend that captures imagination and playful style. The rise of these enchanting nail designs reflects a broader cultural shift towards nostalgic and fantasy-inspired fashion.
Why are Tinkerbell nails becoming so popular? Several key factors drive this magical trend:
- Social media platforms like Instagram and TikTok have amplified interest in whimsical nail art
- Disney adults are embracing character-inspired beauty looks
- The growing “cottagecore” aesthetic celebrates fairy-like and magical themes
Tinkerbell nails offer more than just a cute design. They represent a form of personal expression that connects people to childhood memories while showcasing creativity. The signature color palette—vibrant greens, sparkling golds, and iridescent glitters—translates beautifully into eye-catching nail art that photographs perfectly for social media.
These magical manicure ideas have transcended simple decoration. They’ve become a statement of personality, perfect for festival wear, Disney park visits, or simply adding a touch of whimsy to your everyday look. Whether you’re a Disney fan or just love playful nail designs, Tinkerbell nails offer something truly special.
“Nail art is a form of self-expression that lets you carry a bit of magic with you wherever you go.” – Beauty Trend Experts
Essential Supplies for Creating Disney Fairy Nail Art
Transforming your nails into a magical Tinkerbell-inspired masterpiece requires the right tools and materials. Whether you’re a beginner or an experienced nail artist, having the perfect disney fairy nail art supplies will make your creative journey smoother and more enjoyable.

Before diving into your pixie-inspired design, you’ll need to gather some key essentials that will help you craft stunning tinker bell themed nail polish looks.
Choosing the Right Green Nail Polish Shades
Selecting the perfect green is crucial for capturing Tinkerbell’s essence. Look for nail polishes that offer:
- Bright lime green reminiscent of Tinkerbell’s dress
- Metallic forest green for depth and dimension
- Shimmery pastel green for a soft fairy-like finish
Glitter and Fairy Dust Essentials
No disney fairy nail art is complete without the right sparkle. Stock up on:
- Fine iridescent glitters
- Holographic micro-glitters
- Gold and silver fairy dust
- Chunky glitter for wing and accent details
Tools for Detailed Pixie Designs
Precision is key when creating intricate fairy-inspired nail art. Invest in these essential tools:
- Ultra-thin detail brushes
- Dotting tools in various sizes
- Nail art stamping plates with fairy and wing designs
- Silicone nail art stencils
With these supplies, you’ll be ready to create enchanting Tinkerbell-inspired nail designs that sparkle with magic and creativity.
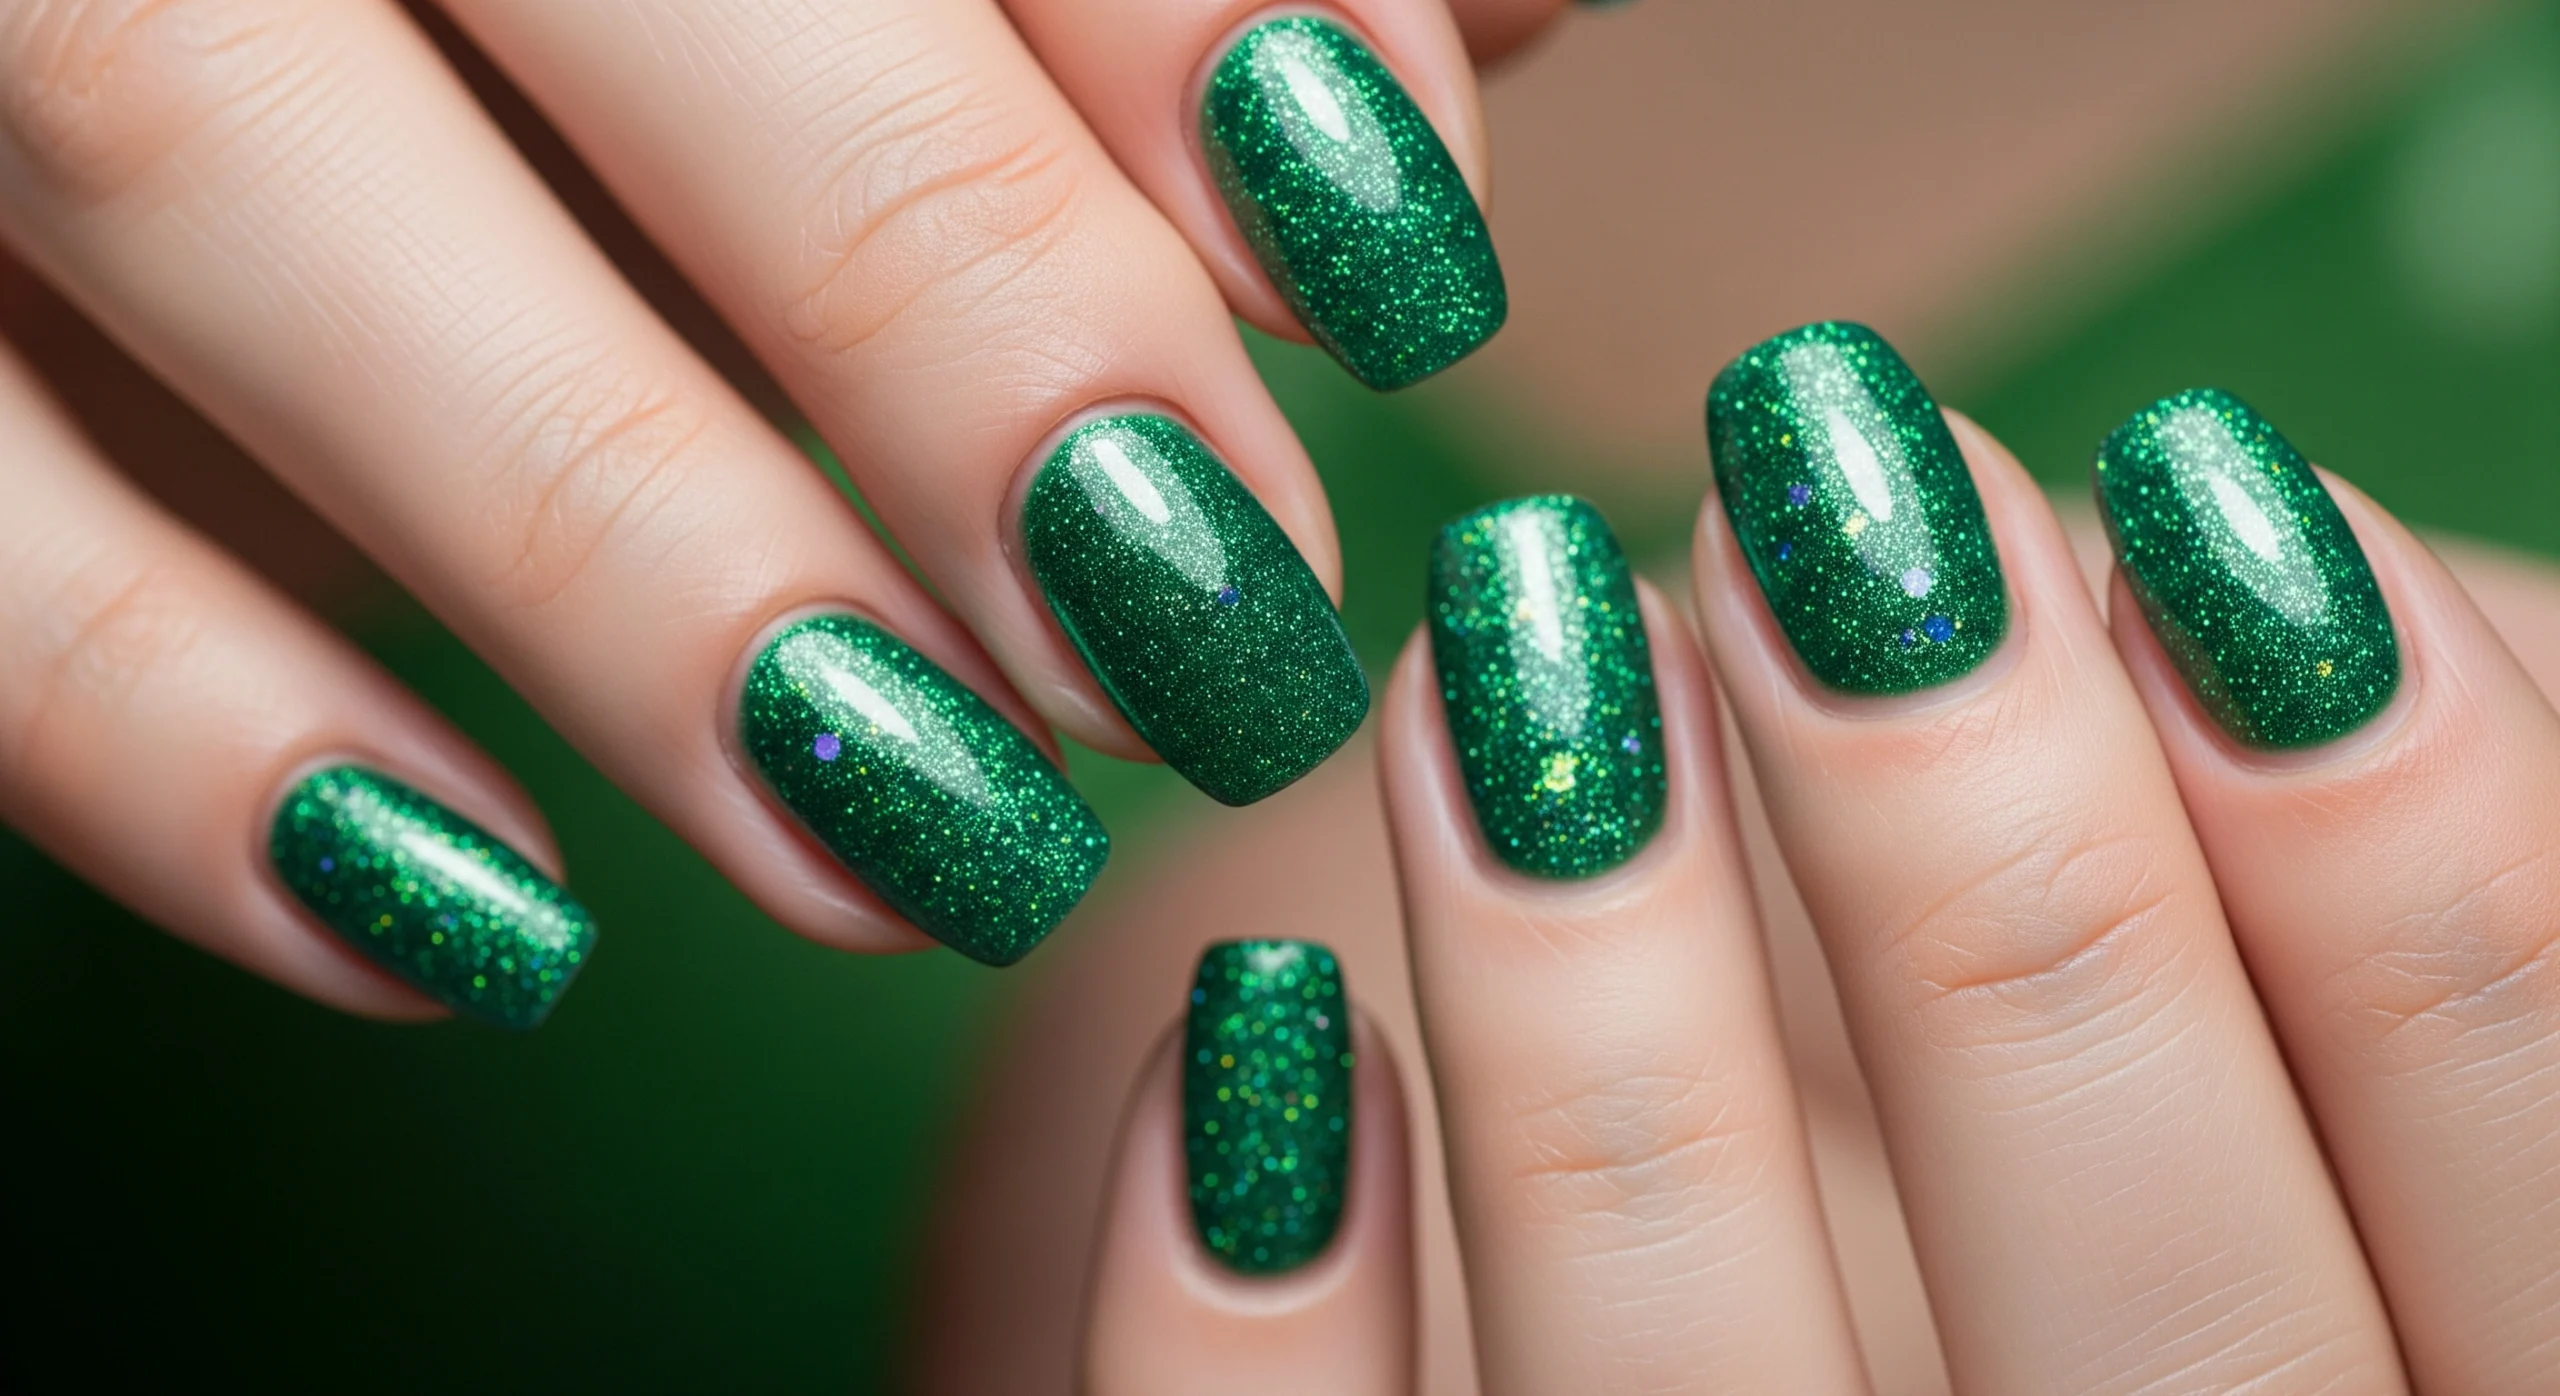
Classic Green Glitter Nail Design

Unleash your inner fairy with the ultimate green glitter nail design that captures the magical essence of Tinkerbell. This classic manicure transforms your nails into a sparkling wonderland that’s both playful and sophisticated.
Creating the perfect green glitter nail design requires a few key steps. Start by preparing your nails with a smooth base coat to ensure maximum glitter adhesion and longevity.
- Choose a vibrant green base polish that complements your skin tone
- Select a high-quality green glitter that matches Tinkerbell’s magical aesthetic
- Prepare clean, filed, and shaped nails for the best application
Your tinkerbell nails will shine brightest with these application techniques:
- Apply a thin layer of clear base coat
- Paint 2-3 coats of green glitter polish for full coverage
- Seal with a top coat to prevent chipping and enhance shine
Pro tip: For an extra magical touch, try an ombré effect by blending different shades of green glitter from light to dark. This technique adds depth and dimension to your fairy-inspired nail art.
Nail artists agree: A perfect green glitter design is all about layering and precision!
Whether you’re heading to a Disney-themed party or want to add a touch of pixie magic to your everyday look, this classic green glitter nail design promises to enchant and delight.
Peter Pan Inspired Manicure with Woodland Accents
Transform your nail art into a magical journey through Neverland with a peter pan inspired manicure that captures the enchanting spirit of Disney’s beloved characters. This design goes beyond Tinkerbell’s signature look, embracing the entire woodland realm of Peter Pan’s magical world.

Incorporating Leaves and Nature Elements
Create a whimsical peter pan inspired manicure by bringing the forest to your fingertips. Start with a soft green base that mimics the lush landscapes of Pixie Hollow. Use these techniques to add natural elements:
- Delicate leaf stencils in varying shades of green
- Tiny vine details using thin nail art brushes
- Miniature mushroom and flower accents
- Textured green polish to create depth
Adding Peter Pan Color Palette Details
Elevate your peter pan inspired manicure by incorporating the iconic color scheme of Neverland. Mix earthy tones with magical highlights to capture the essence of this timeless story.
- Forest green base with sky blue highlights
- Warm brown accent nails representing Peter’s adventure spirit
- Subtle gold glitter to represent fairy dust
- Soft green gradient mimicking woodland landscapes
Your woodland-inspired nail design will transport you directly to the magical world of Peter Pan, creating a stunning tribute to the beloved Disney classic.
Magical Wing Accent Nails Tutorial

Transform your manicure into a fairy-inspired masterpiece with wing accent nails that capture the ethereal magic of Tinkerbell. These delicate designs bring a touch of whimsy to your fingertips, creating a stunning visual that’s both elegant and playful.
Creating wing accent nails requires precision and creativity. Start by selecting the right tools and techniques to bring your magical vision to life. Here are some essential steps to achieve the perfect fairy-inspired look:
- Choose a translucent base color like iridescent white or pale blue
- Use ultra-fine detail brushes for intricate wing patterns
- Incorporate shimmery glazes to create depth and dimension
- Select strategic glitter placement for wing accent nails
Your wing accent nails can take multiple forms. Some nail artists prefer hand-painting delicate wing structures, while others opt for nail decals or stamping techniques. The key is capturing the translucent, delicate nature of fairy wings.
| Technique | Difficulty Level | Best For |
|---|---|---|
| Hand-Painting | Advanced | Detailed wing vein structures |
| Nail Decals | Beginner | Quick and precise wing designs |
| Stamping | Intermediate | Consistent wing patterns |
Pro tip: Use wing accent nails as a focal point by applying the design to one or two fingers, creating a magical statement that draws attention to your fairy-inspired manicure.
Fairy Dust Nails with Sparkle Ombre Effect
Transform your nails into a magical canvas with the enchanting fairy dust nails technique that brings a touch of pixie magic to your manicure. This sparkling design captures the ethereal essence of Tinkerbell’s magical world, creating a mesmerizing gradient that looks like it’s been sprinkled with pure enchantment.

Fairy dust nails are more than just a trend – they’re a wearable piece of magic that allows you to express your whimsical side. The key to creating the perfect fairy-inspired look lies in mastering the sparkle ombre technique.
Creating the Perfect Gradient
Achieving a stunning fairy dust nails gradient requires precision and creativity. Follow these steps to create your magical masterpiece:
- Start with a smooth base coat in a light, neutral shade
- Select glitter in varying sizes and complementary colors
- Use a makeup sponge for precise glitter application
- Dab glitter from tips or base, building intensity gradually
Sealing Your Glitter Design
The final touch for your fairy dust nails is a flawless seal that preserves the magical sparkle. Pro tips for a long-lasting, glossy finish include:
- Choose a high-quality, thick top coat
- Apply multiple thin layers instead of one thick coat
- Use a glitter-specific top coat for extra shine
- Allow each layer to dry completely between applications
“Fairy dust nails are like wearing a piece of magic on your fingertips – delicate, sparkling, and utterly enchanting.”
With these techniques, you’ll create a manicure that captures the whimsical spirit of Tinkerbell, transforming your nails into a magical statement of personal style.
Tinkerbell Nails with Character Portrait Art
Creating tinkerbell nails with character portrait art transforms your manicure into a magical storytelling canvas. Disney fairy nail art reaches new heights when you capture Tinkerbell’s enchanting essence directly on your fingernails. This advanced technique requires patience, precision, and a creative touch.
To achieve stunning character portraits, you’ll want to focus on key design strategies:
- Select high-quality reference images with clear details
- Use fine-tipped brushes for intricate facial features
- Concentrate on Tinkerbell’s most recognizable elements
Your nail art toolkit should include:
| Tool | Purpose |
|---|---|
| Acrylic Paint | Detailed character rendering |
| Thin Art Brushes | Precise line work and facial details |
| Magnifying Glass | Helping with miniature design accuracy |
Professional nail artists recommend simplifying complex details. Focus on Tinkerbell’s iconic silhouette or profile view instead of attempting overly complicated full-face portraits. This approach ensures character recognition while maintaining artistic elegance in your disney fairy nail art design.
For those less confident in painting skills, consider using high-quality nail decals or water slide transfers featuring Tinkerbell. These options provide professional-looking results with minimal artistic effort, perfect for special occasions or Disney park visits.
Minimalist Pixie Nail Art for Everyday Wear
Not every pixie nail art design needs to be elaborate or overly dramatic. Sometimes, the most magical manicures are those that subtly capture the essence of fairy whimsy while remaining professional and understated. Your everyday nail art can whisper fairy tales without shouting them from the rooftops.
Simple Fairy Silhouettes
Creating pixie nail art doesn’t require complex techniques. You can transform your nails into enchanting canvases with minimal effort. Start by selecting a neutral base color like soft nude or pale pink. The key is to use delicate lines and simple shapes to suggest a fairy presence.
- Choose a thin nail art brush for precise silhouettes
- Opt for metallic gold or soft green for your fairy outline
- Focus on creating elegant, minimalist fairy shapes
Subtle Shimmer Techniques
Capturing fairy magic doesn’t mean drowning your nails in glitter. Subtle shimmer techniques can add just the right touch of enchantment to your pixie nail art. Consider using sheer iridescent top coats or delicate glitter gradients that catch light beautifully.
- Apply a whisper-thin layer of holographic top coat
- Create gentle glitter tips for a touch of sparkle
- Use fine, translucent shimmer particles
Your pixie nail art can be both professional and magical, proving that fairy-inspired designs aren’t just for special occasions. With these minimalist techniques, you’ll carry a bit of enchantment wherever you go.
Bold Tinker Bell Themed Nail Polish Combinations
Creating stunning tinker bell themed nail polish designs requires a strategic approach to color and creativity. Your magical manicure can transform ordinary nails into a whimsical fairy-inspired masterpiece with the right color combinations.
Start by exploring the quintessential Tinkerbell color palette. Your nail polish selection should include:
- Vibrant lime green
- Metallic gold
- Soft cream white
- Pale shimmer yellow
When designing your tinker bell themed nail polish look, consider these bold combination techniques:
- Color blocking with sharp geometric patterns
- Alternating colors across different fingers
- Creating negative space designs
- Incorporating gradient effects
Expert nail artists recommend using striping tape or vinyl guides to achieve clean, precise lines between colors. Experiment with unexpected pairings like forest green with champagne shimmer or bright lime green with metallic accents to capture Tinkerbell’s playful spirit.
Your goal is to create a manicure that speaks to the magical essence of Disney’s most beloved fairy. Whether you prefer subtle shimmer or bold statement colors, your tinker bell themed nail polish can showcase your creativity and whimsy.
Three-Dimensional Fairy Wing Designs
Elevate your disney fairy nail art with stunning three-dimensional wing accent nails that bring magical depth to your manicure. These intricate designs transform ordinary nails into extraordinary fairy-inspired masterpieces that capture the essence of Tinkerbell’s enchanting wings.
Creating dimensional wing designs requires specialized techniques and materials. You’ll want to explore several approaches to achieve breathtaking results:
- 3D nail art gels for sculpted wing shapes
- Translucent nail art foils for iridescent effects
- Acrylic powder techniques for raised wing structures
- Pre-made 3D wing embellishments
When designing your wing accent nails, consider these key factors:
- Select nail length that supports intricate wing designs
- Choose complementary colors that enhance wing details
- Use proper adhesion techniques for long-lasting wear
| Technique | Difficulty Level | Visual Impact |
|---|---|---|
| 3D Gel Sculpting | Advanced | High |
| Nail Art Foils | Intermediate | Medium |
| Acrylic Wing Structures | Professional | Very High |
Pro tip: Practice your wing accent nails on artificial nail tips before attempting the final design. This approach helps you perfect intricate details and build confidence in your disney fairy nail art skills.
Caring for Your Magical Manicure Ideas
Preserving the enchantment of your Tinkerbell nails requires careful attention and strategic maintenance. Your magical manicure ideas can remain stunning with the right care techniques, ensuring your fairy-inspired nail art stays pristine and captivating.
Protecting your intricate nail designs demands a proactive approach. Glitter and detailed Tinkerbell nails need special consideration to maintain their magical appearance.
Extending the Life of Glitter Nails
Keep your sparkling nail art looking fresh with these essential strategies:
- Apply a high-quality clear top coat every 2-3 days
- Wear protective gloves during household chores
- Avoid harsh chemicals that can damage glitter polish
- Use cuticle oil to prevent nail brittleness
Touch-Up Tips for Detailed Designs
Maintaining the intricate elements of your Tinkerbell nails requires precision and patience:
- Keep a thin brush for quick repair work
- Match polish colors exactly for seamless touch-ups
- Gently refresh top coat to seal minor imperfections
- Remove glitter nails carefully to prevent damage
With these magical manicure ideas, your Tinkerbell nails will continue to sparkle and enchant, keeping the fairy magic alive on your fingertips.
Conclusion
Your exploration of Tinkerbell nails has unveiled a world of magical nail art possibilities. From classic green glitter designs to intricate pixie nail art, you’ve discovered techniques that transform ordinary manicures into extraordinary expressions of creativity. Each style we’ve explored offers a unique way to bring Disney magic to your fingertips.
The versatility of Tinkerbell-inspired designs means you can adapt these techniques to match your personal style and skill level. Whether you’re a beginner looking to try simple fairy silhouettes or an advanced nail artist creating three-dimensional wing designs, there’s a look that speaks to your inner pixie. Your manicure becomes more than just a beauty routine—it’s a canvas for storytelling and self-expression.
As you embark on your own pixie nail art adventure, remember that creativity knows no bounds. The tutorials and techniques we’ve shared are starting points for your imagination. Don’t be afraid to experiment, mix styles, and develop your unique approach to Tinkerbell-inspired nail designs. Social media platforms are perfect for sharing your creations and connecting with other Disney nail art enthusiasts who share your passion.
Your journey into magical manicures is just beginning. Each nail design carries a sprinkle of pixie dust, transforming an everyday beauty ritual into a moment of Disney-inspired joy. Embrace the magic, trust your creativity, and let your Tinkerbell nails tell your own enchanting story.
FAQ
What are Tinkerbell nails?
Tinkerbell nails are a style of nail art inspired by the Disney fairy character, typically featuring green, gold, and sparkly elements that capture the magical essence of Pixie Hollow. These designs range from simple glitter applications to elaborate character-themed nail art that celebrates the whimsical spirit of Tinkerbell.
Do I need special skills to create Tinkerbell-inspired nail art?
Not at all! Tinkerbell nail designs come in various complexity levels. You can start with simple green glitter nails or gradient designs if you’re a beginner, and gradually progress to more intricate techniques like character portraits or wing accents as you build confidence.
What supplies do I need to create Tinkerbell nail art?
Essential supplies include green nail polishes in various shades, glitter (fine and chunky), gold accent polishes, detail brushes, dotting tools, a good base coat, and a high-quality top coat. Optional items include nail stamping plates, wing-shaped decals, and thin striping brushes for more detailed designs.
How long do Tinkerbell-inspired manicures typically last?
With proper application and care, your Tinkerbell nail art can last 7-10 days. Using a good base coat, multiple thin layers of polish, and a protective top coat will help extend the life of your manicure. Be sure to wear gloves during cleaning and avoid activities that might chip your nail art.
Can I wear Tinkerbell nails in a professional setting?
Absolutely! Opt for more subtle designs like minimalist fairy silhouettes, soft green shimmer, or nude bases with delicate gold accents. These styles capture the magical theme while remaining workplace-appropriate and sophisticated.
Are Tinkerbell nails only for Disney fans?
Not at all! While Disney enthusiasts love these designs, Tinkerbell-inspired nail art appeals to anyone who enjoys whimsical, creative manicures. The color palette and magical themes are universally appealing, making these designs fun for all ages and personal styles.
What are the most popular Tinkerbell nail art techniques?
Some of the most popular techniques include green glitter ombre, wing accent nails, fairy dust designs, character silhouettes, and color blocking with green and gold tones. 3D wing designs and detailed character portraits are also trending among more advanced nail art enthusiasts.
How do I remove glittery Tinkerbell nail designs?
Use acetone-based nail polish remover and cotton pads. Soak the pads and hold them on your nails for 30-60 seconds to help dissolve the glitter. For stubborn glitter, use foil removal technique by wrapping acetone-soaked cotton around each nail to make removal easier.