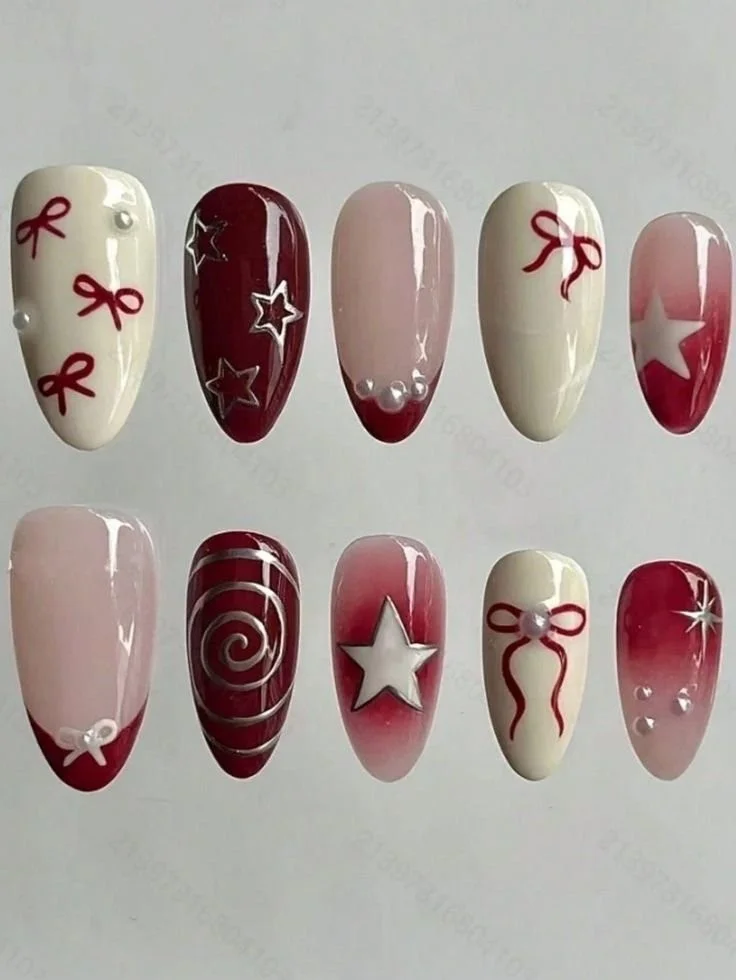
Astronomy nails: 3 Easy Ways to Paint Galaxies
Ever wondered how to transform your fingertips into a mesmerizing cosmic canvas? Galaxy nail art isn’t just for professional nail technicians—it’s an accessible and stunning way to express your love for the universe right at your fingertips. Whether you’re dreaming of creating a classic nebula design, starry night nails with constellation patterns, or planetary designs…
Ever wondered how to transform your fingertips into a mesmerizing cosmic canvas? Galaxy nail art isn’t just for professional nail technicians—it’s an accessible and stunning way to express your love for the universe right at your fingertips.
Whether you’re dreaming of creating a classic nebula design, starry night nails with constellation patterns, or planetary designs featuring Saturn and Jupiter, this guide will demystify the process for beginners and intermediate nail artists. Each design can be completed in under an hour with the right techniques and tools.
Cosmic nail art might seem intimidating, but with step-by-step instructions and a bit of practice, you’ll be creating professional-looking galactic masterpieces that will leave everyone starstruck.
Key Takeaways
- Galaxy nail art is achievable for all skill levels
- Most designs take less than 60 minutes to complete
- Minimal specialized tools are required
- Three distinct galaxy design styles to explore
- Perfect for expressing creativity and love of astronomy
Understanding the Cosmic Beauty of Astronomy Nails
Astronomy nails transform ordinary manicures into breathtaking cosmic landscapes. These intricate nail designs capture the mesmerizing beauty of space, bringing celestial wonders right to your fingertips. By blending artistic techniques with astronomical inspiration, nail artists create miniature universes that spark imagination and wonder.
The magic of astronomy nails lies in their ability to recreate celestial phenomena through creative nail polish techniques. Artists use specialized methods to mimic:
- Swirling nebula patterns
- Starry night backgrounds
- Planetary surface textures
- Galactic color gradients
Nail enthusiasts are drawn to these designs for several compelling reasons:
| Design Appeal | Creative Potential |
|---|---|
| Unique visual storytelling | Unlimited color combinations |
| Scientific aesthetic | Personal artistic expression |
| Conversation starter | Technically challenging technique |
Astronomy nails represent more than just a trend—they’re a celebration of cosmic beauty and human creativity. Each design tells a unique story, transforming personal style into a miniature astronomical canvas.
Essential Tools and Materials for Galaxy Nail Art
Creating stunning astronomy-inspired nail designs requires a carefully curated collection of specialized tools and materials. Professional nail artists know that the right equipment can transform an ordinary manicure into a breathtaking cosmic masterpiece.
Preparing for your galaxy nail art journey means gathering an arsenal of creative instruments that will help you craft intricate space-themed designs with precision and flair.
Selecting the Right Base and Protective Layers
Your galaxy nail art starts with a solid foundation. Choose a high-quality base coat that protects your natural nails and creates a smooth canvas for your cosmic design. A clear top coat is equally crucial for sealing in your artwork and providing long-lasting shine.
- Clear base coat for nail protection
- Glossy top coat for durability
- Quick-dry top coat to prevent smudging
Crafting Your Cosmic Color Palette
Nail polish selection is critical for achieving realistic galaxy effects. Opt for deep blues, rich purples, midnight blacks, and shimmering metallics that capture the essence of deep space.
- Dark navy blue
- Deep purple
- Metallic silver
- Black base color
Specialty Tools for Stellar Effects
Transform your nails into miniature universes with these specialized tools:
- Makeup sponges for gradient effects – Create smooth, blended backgrounds that mimic cosmic nebulae
- Dotting tools in various sizes for stars and planets – Perfect for creating precise celestial elements
- Thin nail art brushes for intricate details – Essential for painting fine star clusters and planetary features
- Toothpicks as alternatives for fine work – Budget-friendly option for delicate designs
- Optional embellishments:
- Nail art tape for clean edges
- Fine glitter for starry sparkle
- Small rhinestones for dimensional effects
By investing in these tools and materials, you’ll be well-equipped to bring the mesmerizing beauty of the cosmos right to your fingertips.
Preparing Your Nails for Space-Themed Manicures
Creating stunning astronomy-inspired nail art starts with proper nail preparation. The foundation of a breathtaking galaxy manicure lies in meticulous groundwork that ensures your cosmic design looks professional and lasts longer.
Before diving into your space-themed nail art, follow these crucial preparation steps:
- Clean nails thoroughly with non-acetone nail polish remover
- Trim and shape nails to desired length and style
- Gently push back cuticles using a cuticle pusher
- Buff nail surfaces lightly to create smooth canvas
Nail health plays a critical role in achieving spectacular galaxy designs. Professional nail technicians recommend selecting high-quality base products that protect and strengthen your natural nails.
| Preparation Step | Purpose | Recommended Product |
|---|---|---|
| Nail Cleaning | Remove oils and debris | Non-acetone remover |
| Cuticle Care | Prevent potential design interruptions | Cuticle oil |
| Base Coat Application | Protect nails and improve design adhesion | Clear ridge-filling base coat |
Proper nail preparation transforms your artistic vision from amateur to professional. By investing time in these foundational steps, you’ll create galaxy nail designs that are truly out of this world.
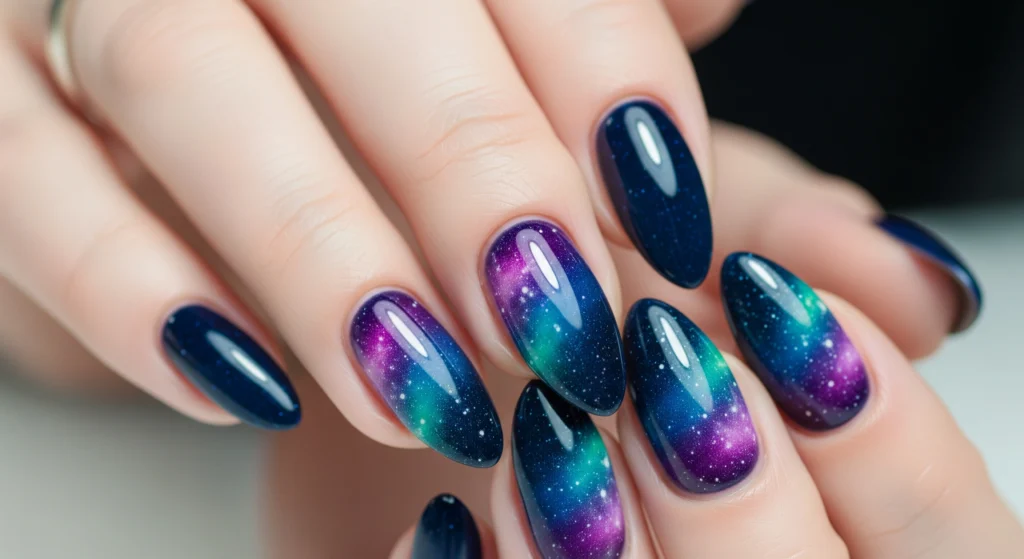
Design One: Classic Nebula Nail Art
Creating a stunning galaxy-inspired manicure requires artistic technique and careful color selection. The classic nebula nail art design transforms your nails into miniature cosmic landscapes, capturing the breathtaking beauty of deep space.
Creating the Deep Space Background
Start with a dark base that mimics the vast darkness of space. Black or deep navy polish works best as your foundation. Use a makeup sponge to create depth and texture:
- Choose a black or deep navy base coat
- Apply small amounts of purple, pink, blue, and magenta polish to the makeup sponge
- Dab the sponge onto the nail in a random, organic pattern
- Build color gradually, working with one or two colors at a time
Adding Colorful Nebula Clouds
Layering colors creates an authentic nebula effect. Blend edges for a seamless look by:
- Using soft, gentle dabbing motions
- Leaving some areas darker than others
- Creating depth through strategic color placement
- Blending colors to mimic cosmic cloud formations
Incorporating Twinkling Stars and Highlights
The finishing touches bring your galactic design to life. Use a dotting tool or toothpick dipped in white polish to create stars:
- Create larger dots for prominent stars
- Add tiny dots for distant starfields
- Place a small dot of silver or holographic polish on some white stars
- Seal the design with a clear top coat for protection and shine
Pro Tip: Vary star sizes to create a more realistic cosmic landscape.
The key to a perfect nebula nail design is patience and creativity. Each nail becomes a unique cosmic canvas, reflecting the infinite beauty of the universe.
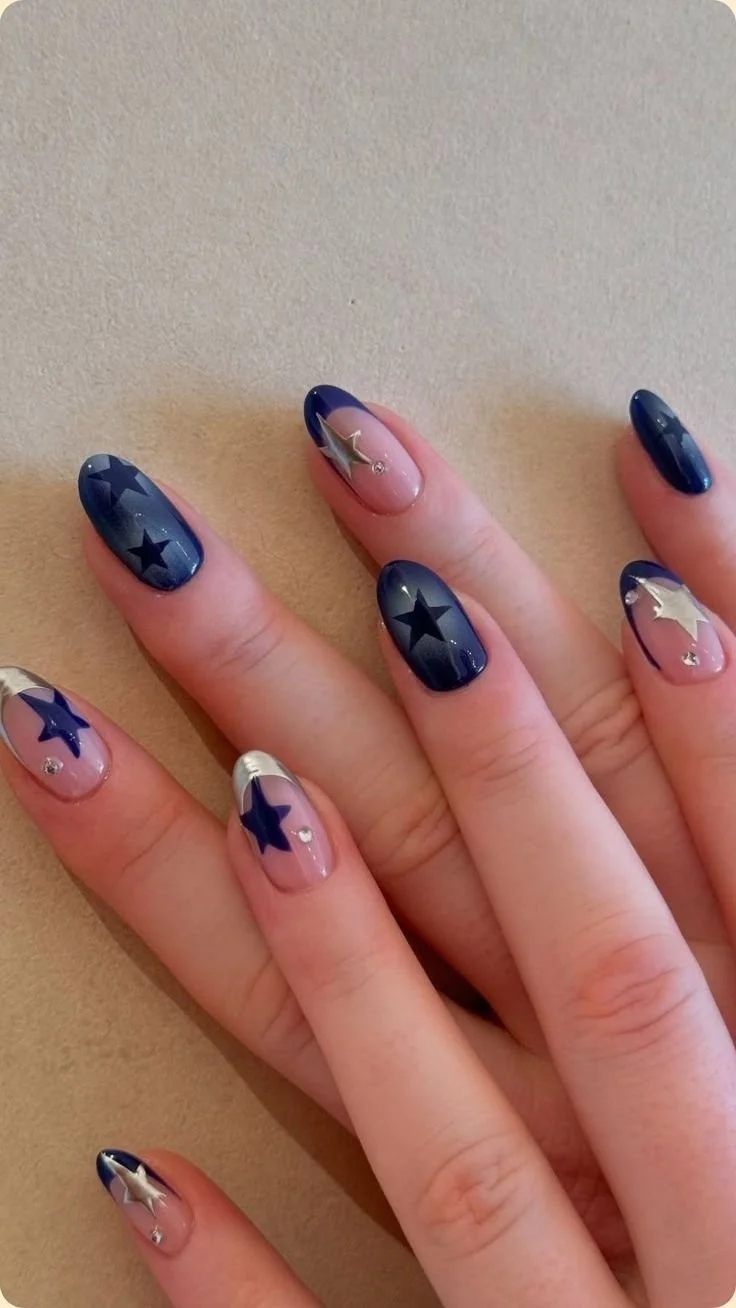
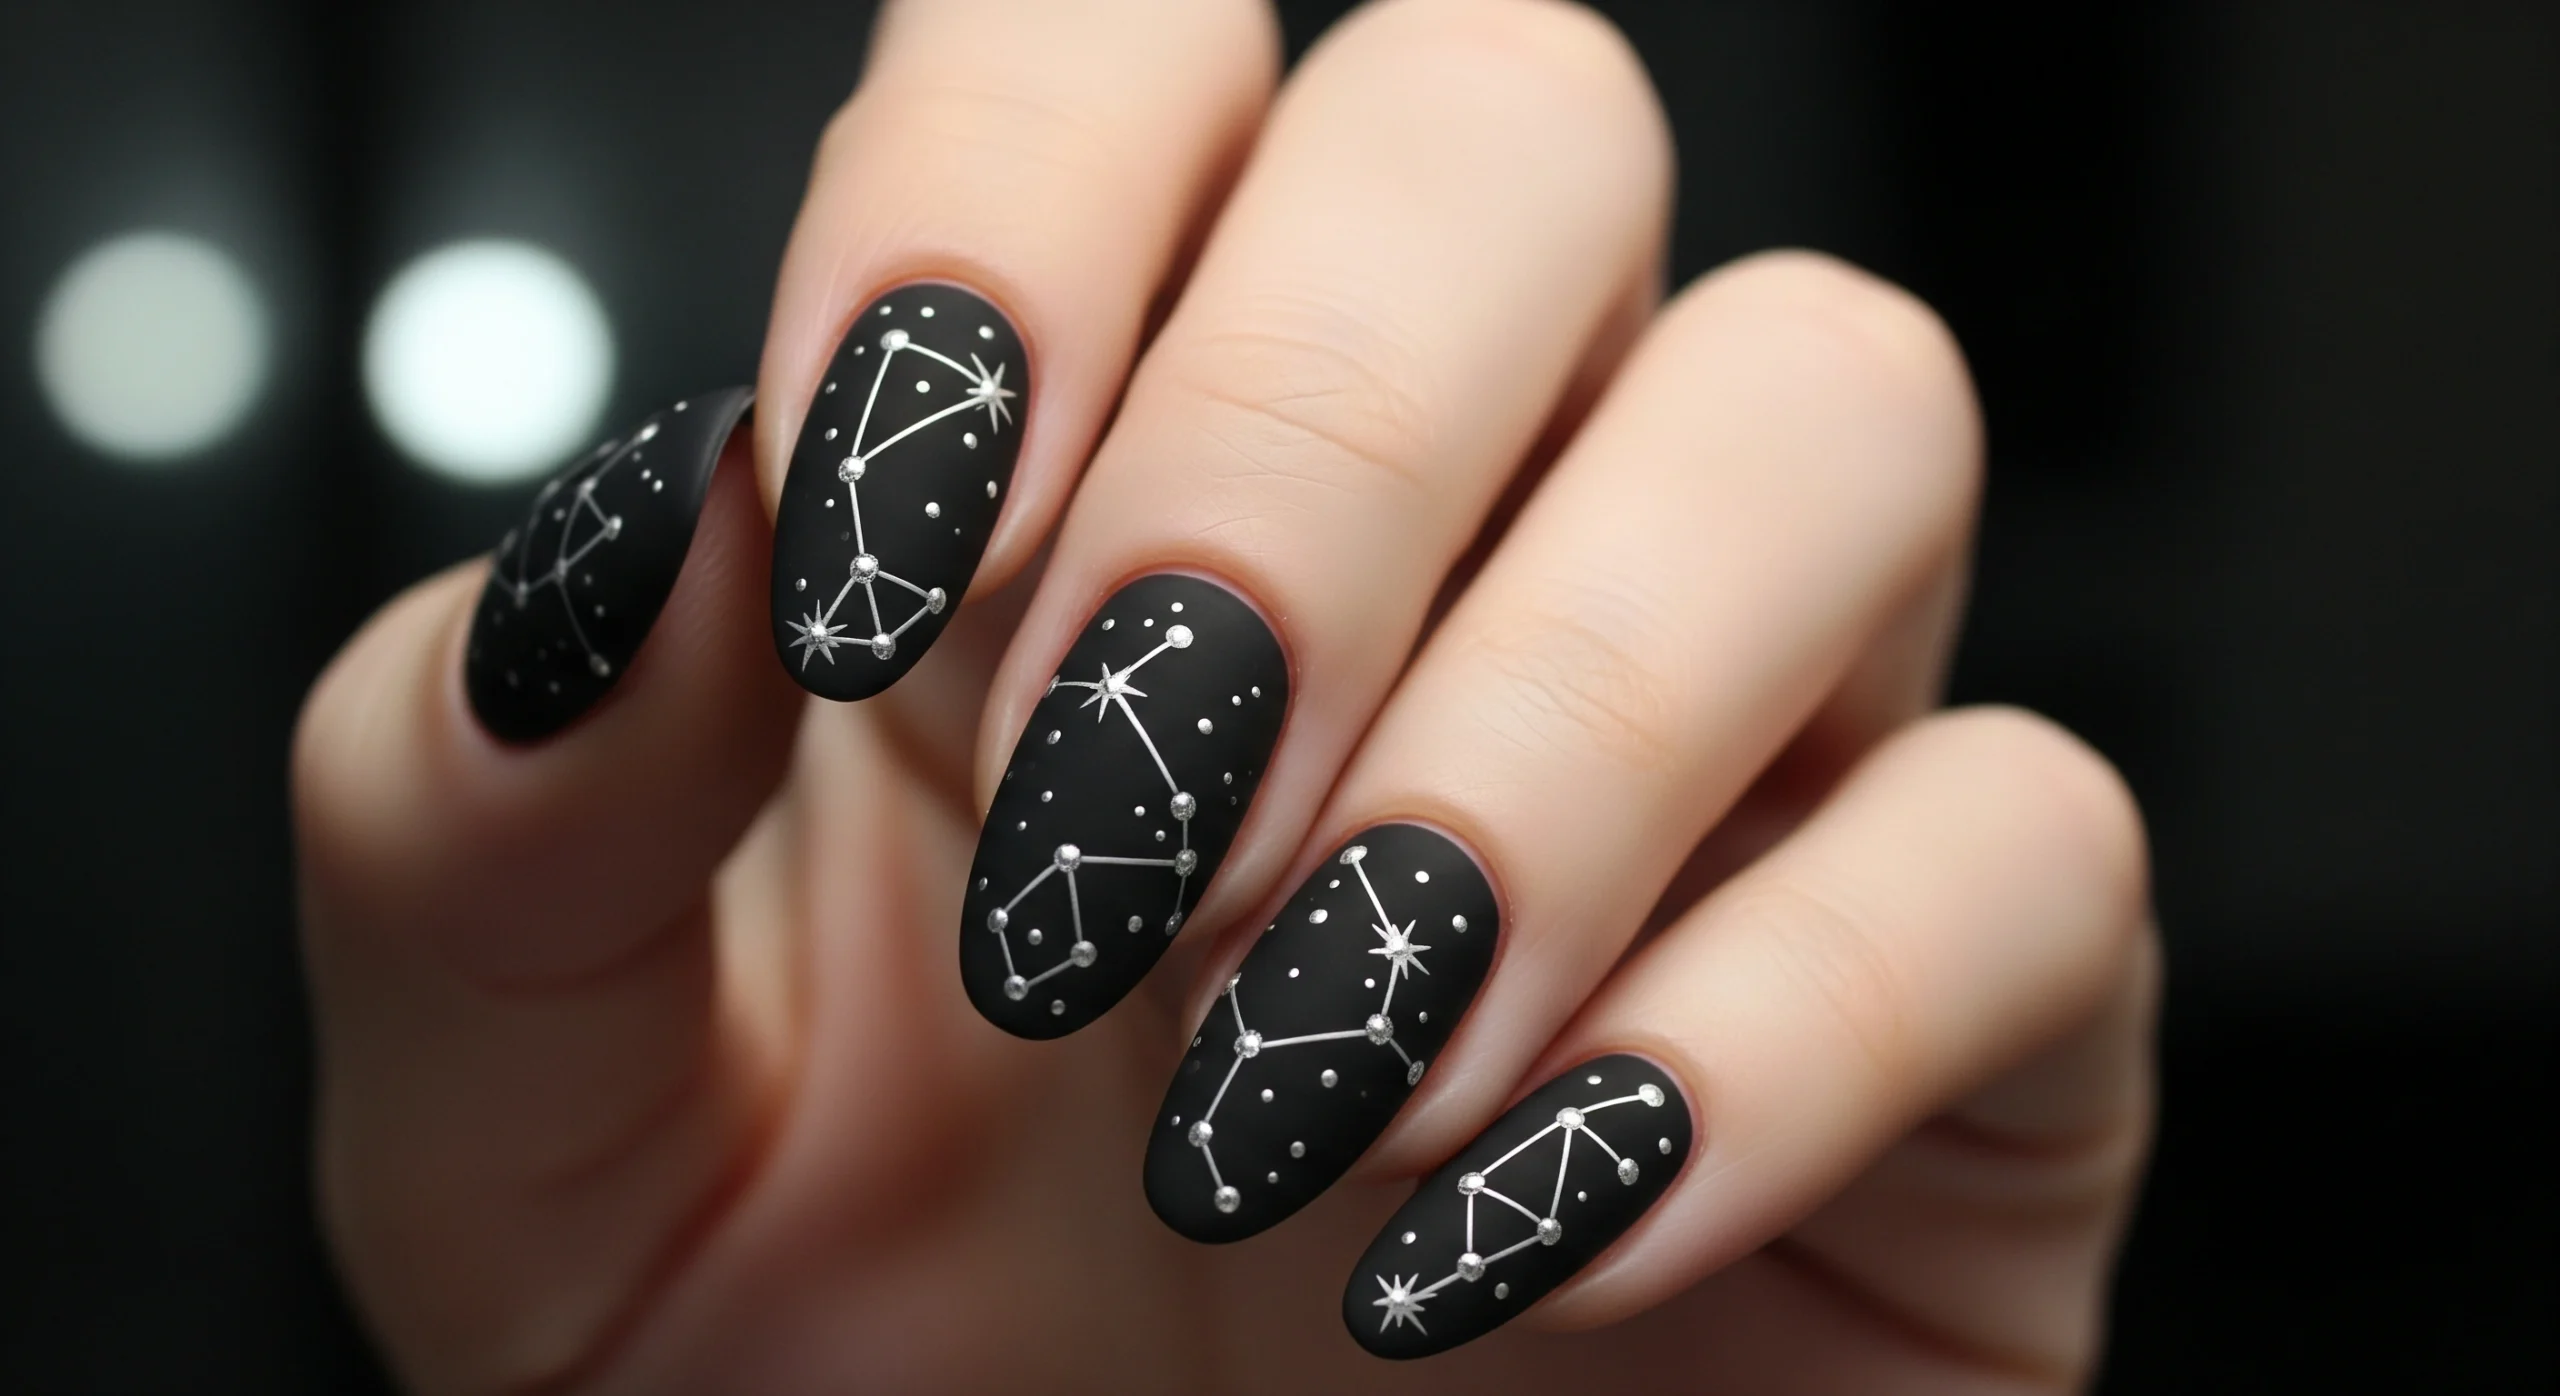
Design Two: Starry Night Nails with Constellation Patterns
Creating starry night nails transforms your manicure into a breathtaking cosmic canvas. These celestial designs capture the magic of the night sky, bringing astronomical wonder to your fingertips. Professional nail artists recommend selecting a deep navy or black base to mimic the darkness of space.
To achieve stunning constellation nail art, you’ll need several key techniques:
- Select a dark base color representing deep space
- Use thin brushes for precise star and constellation mapping
- Incorporate metallic or glitter polishes for starry effects
- Practice tracing authentic constellation patterns
Pro tip: Research actual star charts to create authentic constellation designs. Popular choices include Orion, Ursa Major, and Cassiopeia. Each constellation tells a unique celestial story on your nails.
The technique involves carefully painting thin white or silver lines connecting strategically placed dots. Small metallic accents represent individual stars, creating depth and dimension. Glitter topcoats can enhance the cosmic sparkle, making your nail art truly out of this world.
“Nail art is astronomy you can wear” – Professional Nail Artist
Patience is crucial when designing constellation nails. Take time to map out your design, using reference images to ensure accuracy. A steady hand and thin detail brush will help you create precise stellar patterns that look professional and mesmerizing.
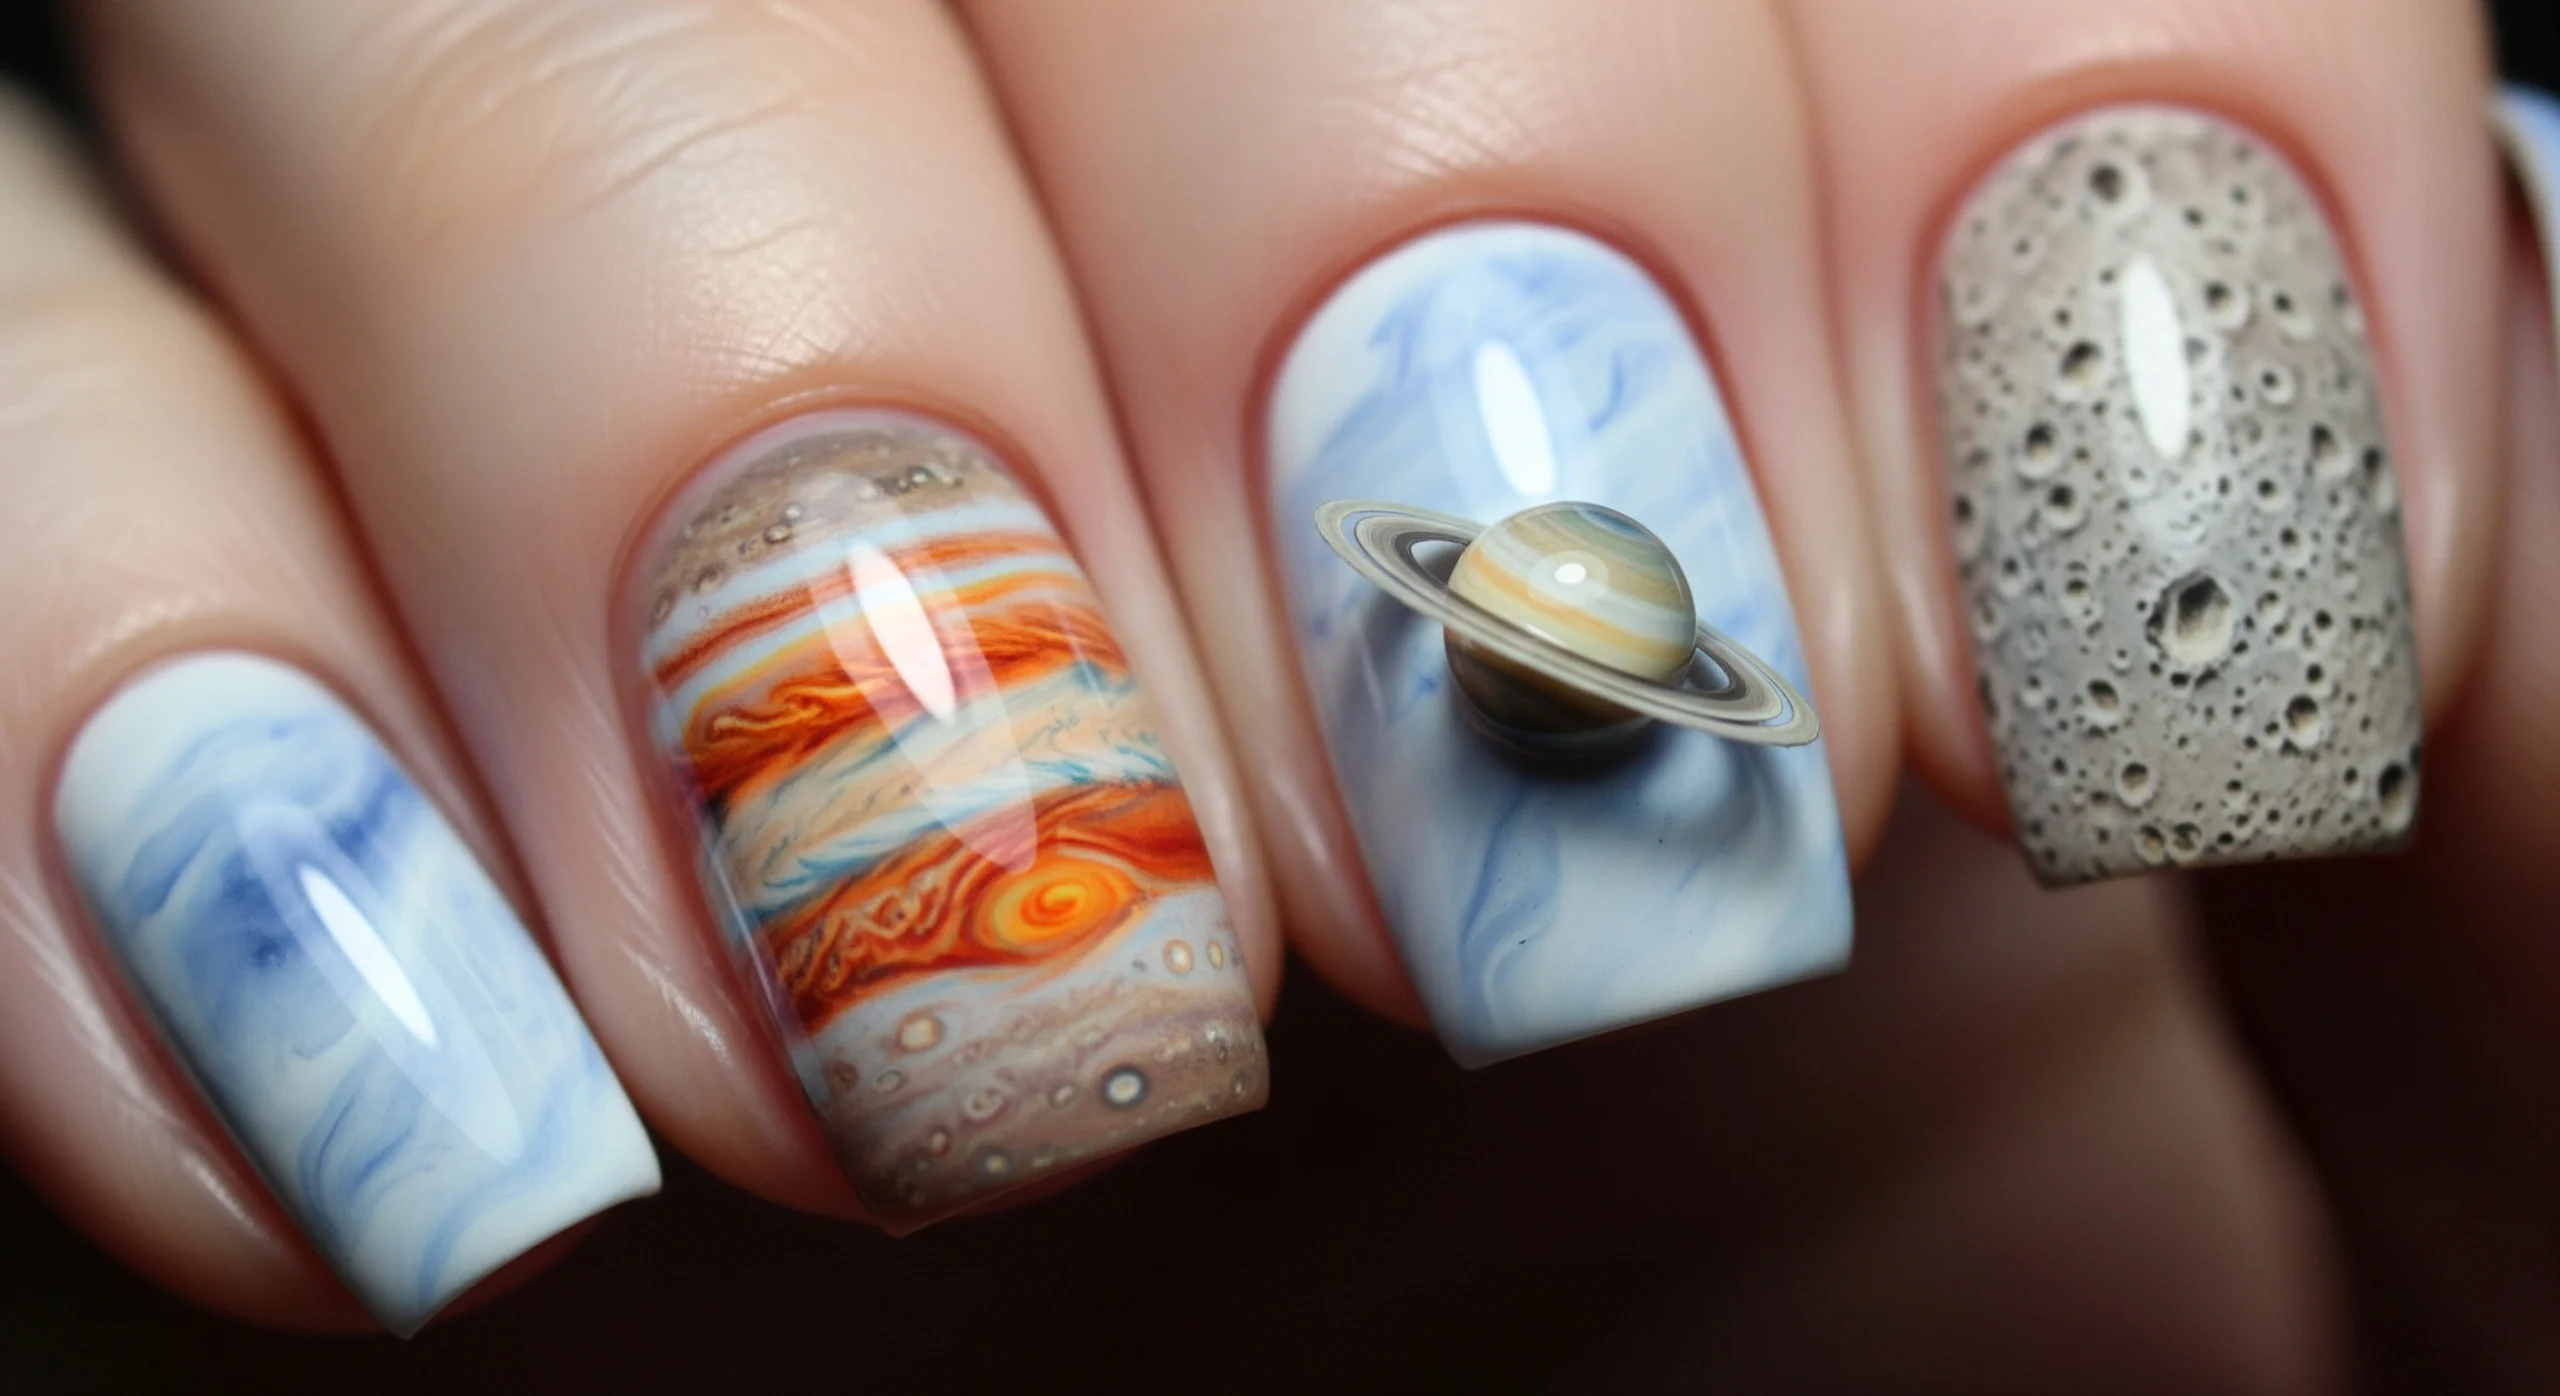
Design Three: Planetary Nail Designs Featuring Saturn and Jupiter
Creating planetary nail art transforms your manicure into a stunning cosmic canvas. These celestial designs capture the mesmerizing beauty of gas giants, bringing the wonder of space directly to your fingertips. With careful technique and creative approaches, you can craft intricate planetary landscapes that showcase the unique characteristics of Saturn and Jupiter.
Planet nail designs require precision and layered techniques to achieve realistic textures and depth. The key is understanding the distinctive surface characteristics of each planet and translating them into nail art.
Painting Realistic Planet Surfaces
Achieving an authentic planetary surface involves strategic color blending and texture techniques:
- Start with a soft neutral base coat
- Use small sponges for creating swirling atmospheric effects
- Blend multiple shades of brown, orange, and beige for Jupiter’s surface
- Incorporate subtle gray and tan tones for Saturn’s unique coloration
Adding Dimensional Rings and Atmospheric Effects
The magic of planetary nail art lies in creating dimensional elements that make your design pop:
- Use thin brushes to create delicate ring structures
- Apply metallic polish for ring highlights
- Add subtle glitter for atmospheric shimmer
- Experiment with translucent overlays to build depth
Mastering these techniques will help you transform ordinary nail polish into extraordinary cosmic landscapes that capture the imagination.
Advanced Techniques for Celestial Nail Polish Application
Creating stunning galaxy nail art requires precision and specialized techniques. Professional nail artists know that achieving cosmic-inspired designs demands mastery of specific application methods that transform ordinary polish into extraordinary celestial landscapes.
Mastering the Sponge Gradient Method
Selecting the right type of sponge is crucial for galaxy nail designs. Makeup sponges work significantly better than household sponges due to their finer, more uniform texture. When applying polish to the sponge, artists recommend two primary approaches:
- Direct application onto the sponge
- Applying polish first on a palette, then transferring to the sponge
The proper dabbing motion makes all the difference in creating seamless gradients. Use a light, bouncing technique to transfer color onto the nail, working with colors in strategic order. Troubleshooting common issues requires careful attention:
- Too much polish creates thick, bumpy textures
- Too little polish results in patchy appearances
Techniques vary between using a slightly damp versus a dry sponge. A damp sponge provides softer color blending, while a dry sponge offers more intense color placement.

Using Dotting Tools for Perfect Stars
Dotting tools are essential for creating realistic star effects in galaxy nail designs. Different sizes serve unique purposes:
| Dotting Tool Size | Best Use |
|---|---|
| Large | Creating primary star clusters |
| Medium | Adding secondary stars |
| Small | Detailed twinkling effects |
When loading polish onto dotting tools, balance is key. Avoid overloading which causes blobbing, but ensure enough polish to transfer. Create depth by varying star sizes and using a smaller shimmer polish dot on white stars for a twinkling effect.
Pro tip: Clean dotting tools between colors using acetone, or improvise tools from household items like bobby pins and toothpicks for added creativity.
Sealing and Protecting Your Cosmic Nail Art
Creating stunning galaxy nail designs requires more than just artistic skill—it demands careful sealing and protection to preserve your celestial masterpiece. Waiting until all design elements are completely dry (typically 10-15 minutes after the final detail work) is crucial for achieving a flawless finish.
Choosing the right top coat can make or break your galaxy nail art. Different top coats offer unique advantages:
- Quick-dry top coats: Ideal for impatient artists who want rapid drying
- Gel-effect top coats: Provide extra shine and durability
- Traditional glossy finishes: Classic protection with a smooth appearance
Apply a generous but not excessive layer of top coat, carefully capping the free edge of the nail to prevent chipping. Pro tip: Reapply top coat every 2-3 days to refresh the shine and add an extra layer of protection.
For professional-looking results, use these nail care techniques:
- Clean up edges using a small brush dipped in acetone
- Fix small smudges with gentle touch-ups
- Use the touch test to check drying completeness
- Wait at least one hour before exposing nails to water
Consider using quick-dry drops or sprays as optional accelerators to speed up the drying process. These tools help set your cosmic nail art quickly while maintaining the intricate details of your galactic design.
Common Mistakes to Avoid When Creating Galaxy Nail Designs
Galaxy nail art can be tricky, but understanding common pitfalls helps artists create stunning cosmic designs. Learning from mistakes is part of the creative journey, and even imperfect galaxy nails can showcase unique beauty.
- Applying colors before the base is fully dry creates muddiness instead of distinct layers. Wait for each layer to completely dry to maintain crisp, separate color zones.
- Using too much polish on the sponge results in thick, bumpy textures. Dab excess polish off the sponge before applying to achieve smooth, ethereal gradients.
- Making stars too uniform makes designs look artificial. Vary star sizes and spacing to create a more natural, random cosmic landscape.
Color selection plays a crucial role in galaxy nail art. Choosing colors that don’t contrast enough with the dark background can make intricate details invisible. Select vibrant, contrasting shades that pop against a deep space backdrop.
- Skipping the base coat leads to nail staining and poor polish adhesion. Always apply a clear base coat to protect your natural nails and create a smooth canvas.
- Applying top coat before designs dry causes smearing and blending of carefully placed details. Patient artists allow each layer to dry completely before sealing the design.
The key to beautiful galaxy nails is knowing when to stop. Overworking the design can create visual chaos rather than cosmic beauty. Trust your artistic instinct and step back when the design feels complete.
- Clean up nail edges for a polished look
- Embrace imperfections – cosmic designs are naturally abstract
- Practice makes perfect in nail art techniques
Styling Tips for Wearing Your Space-Themed Manicures
Galaxy nail art transforms your manicure into a celestial statement piece that can complement various fashion styles and occasions. The key is understanding how to integrate these cosmic designs seamlessly into your wardrobe and personal aesthetic.
Creating the Perfect Color Harmony
Pairing astronomy nails requires strategic color coordination. Consider these styling approaches:
- All-black outfits create a sleek, modern look that allows your nails to become the focal point
- Jewel tones like deep purple, emerald, and sapphire echo the cosmic color palette
- Metallics such as silver or gunmetal complement the celestial theme beautifully
- Soft pastels can provide a delicate background for intricate nail designs
Occasions Perfect for Astronomy Nails
Your space-inspired manicure can shine in multiple settings. Here are ideal moments to showcase your stellar nail art:
- Creative Events: Music festivals, concerts where self-expression is celebrated
- Romantic Occasions: Date nights demonstrating personality and creativity
- Science-Themed Gatherings: Planetarium visits, astronomy club meetings
- Festive Celebrations: Holiday parties, especially New Year’s Eve
Professional Styling Considerations
For more conservative work environments, modify your galaxy nail design strategically. Opt for subtle approaches like monochromatic color schemes or limit the cosmic design to accent nails. This allows you to express creativity while maintaining professional boundaries.
Pro Tip: The style of clothing dramatically influences how your astronomy nails are perceived. Edgy, modern pieces create a different aesthetic compared to romantic, flowing fabrics.

Maintaining Your Galaxy Manicure for Long-Lasting Wear
Preserving the cosmic beauty of your astronomy-inspired nail art requires careful maintenance and strategic protection. Your galaxy manicure can remain stunning for days with the right techniques and mindful care.
Addressing small chips is crucial for extending your manicure’s life. For minor imperfections at nail tips, filing gently and reapplying top coat can often disguise the damage. When dealing with more significant chips, use touch-up techniques with the original colors, blending with a light sponging motion to restore the stellar design.
- Protect your manicure during daily activities
- Minimize direct nail contact with hard surfaces
- Use protective strategies for common tasks
Lifestyle factors significantly impact manicure longevity. When typing or working on computers, be conscious of using fingertips rather than nails for keys. For opening cans and packages, utilize tools instead of your nails. During household cleaning or exposure to harsh chemicals, wear protective gloves to shield your galactic nail art.
Know when it’s time to remove and redo your manicure. Key indicators include:
- Significant cuticle growth
- Multiple nail chips or wear
- Diminished shine despite top coat reapplication
For safe removal, use an acetone-based remover with cotton pads. When dealing with stubborn glitter or layered designs, employ foil wraps to ease the process. Always moisturize your nails and cuticles after removal to maintain nail health and prepare for your next cosmic creation.
Conclusion
Mastering astronomy nails is an exciting adventure in creative self-expression. Learning about the appeal of astronomy nails opens up a universe of artistic possibilities right at your fingertips. From gathering the necessary tools and materials to preparing your nails properly, you’ve explored techniques for creating stunning galaxy designs that showcase your unique style.
The three distinct galaxy designs—classic nebula, starry night with constellations, and planetary designs featuring Saturn and Jupiter—provide a solid foundation for your cosmic nail art skills. Sponging, dotting, and layering techniques you’ve learned are transferable to many nail art styles, empowering you to experiment and push creative boundaries.
Your journey doesn’t stop here. Consider exploring other celestial bodies like the moon or Mars, or experiment with advanced techniques such as stamping and water marbling. Each design is an opportunity to reflect your personality and interests through wearable art that truly stands out. Remember, creativity matters more than absolute perfection – your unique cosmic vision is what makes these nail designs truly spectacular.
Embrace the cosmic beauty you can create with your own hands. Nail art is a powerful form of personal expression that allows you to carry a piece of the universe wherever you go. Keep practicing, stay curious, and let your imagination explore new artistic horizons with every manicure.
FAQ
What are astronomy nails?
Astronomy nails are a creative nail art technique that mimics the beauty of space, including galaxy patterns, nebulae, constellations, and planetary designs. These manicures use specialized techniques like sponging, layering, and dotting to create cosmic-inspired nail art.
What tools do I need to create galaxy nail designs?
To create stunning astronomy nails, you’ll need a base coat, top coat, makeup sponges, fine-tipped brushes, dotting tools, and a variety of nail polishes in deep blues, purples, blacks, and metallic shades that represent celestial elements.
How difficult are space-themed nail designs for beginners?
While cosmic nail art might seem complex, many designs are beginner-friendly. Starting with simple techniques like sponge gradients and basic dotting can help you create beautiful galaxy-inspired nails with practice.
How long do galaxy nail designs typically last?
With proper application and a high-quality top coat, celestial nail designs can last up to 7-10 days. Using a good base coat and reapplying top coat every few days can help extend the wear of your space-themed manicure.
Can I create astronomy nails at home without professional training?
Absolutely! Many cosmic nail art techniques can be learned through online tutorials, YouTube videos, and practice. Most designs require basic nail art tools and patience to develop your skills.
What color palette works best for galaxy nail designs?
Ideal colors for space-themed manicures include deep navy blue, black, dark purple, midnight blue, and accent colors like silver, white, and iridescent polishes to create depth and mimic celestial elements.
Are there specific nail polish brands good for astronomy nail art?
Brands like Essie, OPI, and China Glaze offer excellent cosmic nail polish collections. Look for polishes with shimmer, holographic effects, and multi-dimensional glitters that can enhance your galaxy nail designs.
How can I add realistic star effects to my nail art?
Create stars using white polish and a fine dotting tool or toothpick. For more advanced techniques, use glitter topcoats, metallic dot techniques, or thin brushes to create varying star sizes and intensities.
Can astronomy nails be worn for professional settings?
While bold galaxy designs might be dramatic, subtle constellation nail designs or minimalist space-inspired looks can be professional and elegant, suitable for most workplace environments.
How do I protect and maintain my galaxy nail art?
Use a high-quality top coat to seal your design, wear gloves during household chores, avoid harsh chemicals, and touch up your manicure every few days to maintain the cosmic effect and prevent chipping.