Taylor swift nails ideas: How to Do 5 Easy Designs
Are you ready to transform your nails into a canvas that celebrates the musical genius of Taylor Swift? What if you could capture the essence of her most iconic album eras right at your fingertips? Taylor Swift nails ideas are more than just a trend – they’re a creative expression of Swiftie nail art that…

Are you ready to transform your nails into a canvas that celebrates the musical genius of Taylor Swift? What if you could capture the essence of her most iconic album eras right at your fingertips? Taylor Swift nails ideas are more than just a trend – they’re a creative expression of Swiftie nail art that lets you showcase your fan passion with stunning designs.
This guide unveils five incredible nail designs that bring Taylor’s musical journey to life. Whether you’re heading to the Eras Tour, planning a listening party, or simply want to express your love for Swift’s music, these nail art techniques are perfect for fans of all skill levels.
From the dark and edgy Reputation era to the dreamy pastel Lover album, these designs capture the unique aesthetic of each musical moment. You’ll learn how to create impressive looks that require minimal skill but maximum impact.
Key Takeaways
- Discover 5 easy Taylor Swift-inspired nail designs
- Learn techniques suitable for beginners and nail art enthusiasts
- Capture the essence of different Taylor Swift album eras
- Create professional-looking nail art with simple tools
- Express your Swiftie pride through creative nail designs
Why Taylor Swift-Inspired Manicures Are Trending Right Now
The Taylor Swift Eras Tour has sparked a massive wave of creativity among fans, transforming nail art into a powerful form of self-expression. Swifties are turning their manicures into wearable tributes to their favorite album eras, making taylor swift manicure inspirations a global phenomenon.
Social media platforms have become the ultimate showcase for these incredible nail designs. TikTok and Instagram are flooded with millions of views under hashtags dedicated to eras tour nail designs, where fans compete to create the most innovative and eye-catching looks.
- Each album era brings unique color palettes and visual themes
- Fans use nail art to celebrate their favorite Taylor Swift moments
- Manicures have become a way to connect with the Swiftie community
The trend goes beyond simple decoration. These nail designs are a form of artistic storytelling, allowing fans to carry a piece of Taylor’s musical journey right at their fingertips. From the dark, snake-inspired Reputation era to the pastel hearts of Lover, each design tells a unique story.
“Your nails can be your personal concert ticket to the Taylor Swift universe” – Swiftie Nail Art Community
Nail artists and fans alike are pushing creative boundaries, transforming album aesthetics into intricate manicure designs that capture the essence of Taylor Swift’s musical evolution.
| Album Era | Nail Design Inspiration | Color Palette |
|---|---|---|
| Reputation | Snake and Dark Themes | Black, Gold, Dark Metallics |
| Lover | Pastel Hearts | Pink, Lavender, Soft Colors |
| Red | Classic Crimson | Red, Gold Accents |
Essential Supplies You Need for Swift-Inspired Nail Art
Creating sparkly swift-inspired manicures requires more than just passion—you’ll need the right tools and materials to bring Taylor Swift’s iconic nail designs to life. Whether you’re a dedicated Swiftie or a nail art enthusiast, having a well-stocked nail kit is crucial for achieving professional-looking results.
Nail Polish Colors and Finishes
Your swift-inspired manicures start with a killer polish collection. Curate a range of colors that capture the essence of Taylor Swift’s different eras:
- Reputation Era: Deep black and metallic gold polishes
- Lover Era: Soft pastel shades (pink, lavender, blue)
- Red Era: Rich crimson reds with gold shimmer
- Fearless Era: Champagne and golden glitter polishes
- Enchanted Era: Deep purples with silver accents
Tools and Accessories for Perfect Results
To craft those sparkly swift-inspired manicures, you’ll want to invest in some essential nail art tools:
| Tool Category | Recommended Items |
|---|---|
| Preparation | Base coat, top coat, nail file, buffer |
| Detailing | Dotting tools, thin striping brushes, nail art pens |
| Embellishments | Rhinestones, nail stickers, holographic glitter |
| Finishing | Quick-dry spray, cleanup brush, acetone |
With these supplies, you’ll be ready to transform your nails into a tribute to Taylor Swift’s incredible musical journey!
Preparing Your Nails for a Flawless Swiftie Manicure
Creating stunning Taylor Swift nails ideas starts with proper nail preparation. Your manicure’s success depends on how well you set the foundation for your artistic design. A clean, smooth canvas ensures your Swiftie-inspired nail art looks professional and lasts longer.
Begin by removing any existing polish completely. Use an acetone-based remover to eliminate all traces of old color. Gently clean your nails, making sure no residue remains.
- Choose the right nail shape for your Taylor Swift-inspired design
- Softly push back cuticles after moisturizing
- Buff nails to create a smooth surface
- Clean nails with rubbing alcohol for better polish adhesion
Nail shaping plays a crucial role in taylor swift nails ideas. Popular shapes include:
| Nail Shape | Best For |
|---|---|
| Almond | Delicate, feminine designs |
| Square | Bold, geometric patterns |
| Coffin | Dramatic, edgy looks |
Don’t forget to apply a quality base coat before starting your design. This protective layer helps your polish adhere better and prevents staining. Work in a well-lit, ventilated area to ensure the best results for your Taylor Swift-inspired nail art.
“Preparation is key to creating magical nail designs that truly capture the spirit of Taylor Swift’s iconic styles.”
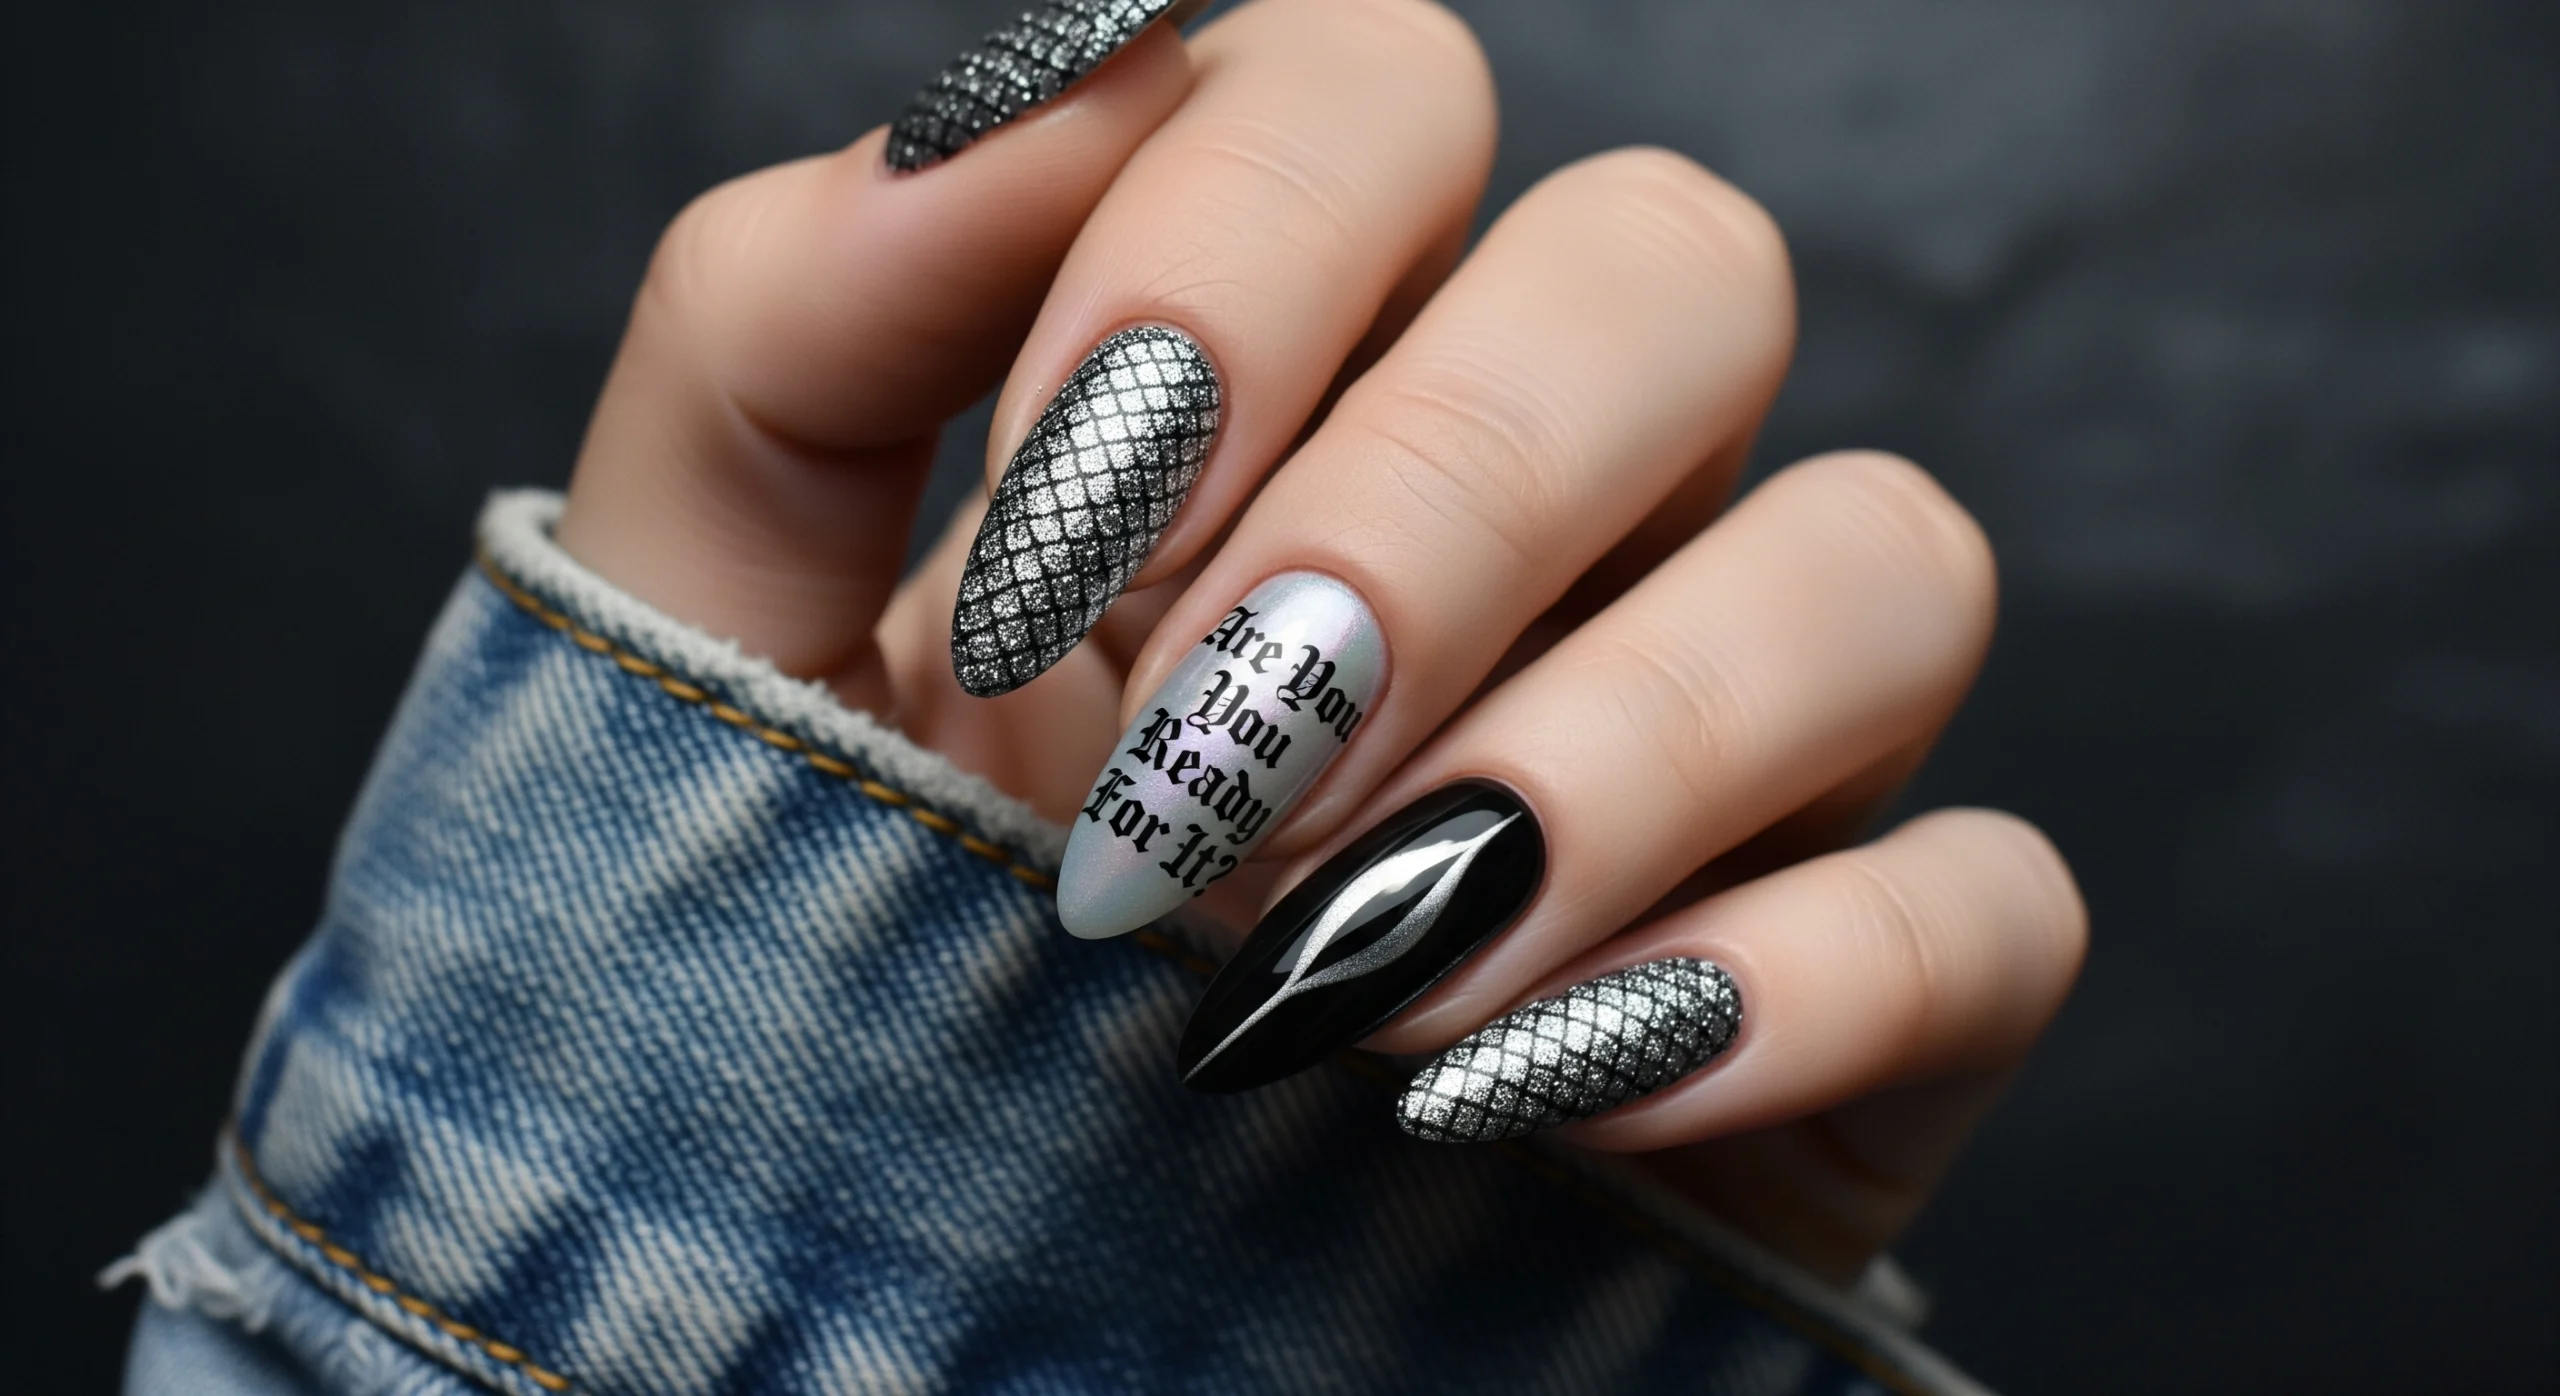
Reputation Era Nails: Dark and Edgy Snake-Inspired Design
Dive into the dramatic world of Taylor Swift’s Reputation era with a bold nail design that captures the album’s intense aesthetic. Reputation era nails are all about embracing a dark, sophisticated look that combines sleek black polish with dramatic gold accents.
The Reputation era represents a transformative moment in Taylor Swift’s career, and these nail designs perfectly reflect the album’s powerful narrative. Black serves as the primary color, symbolizing strength and mystery, while gold elements add a touch of glamour and edge.
Creating Your Dramatic Nail Design
To achieve the perfect reputation era nails, you’ll need a few key supplies:
- Glossy black nail polish
- Metallic gold polish
- Thin nail art brush
- Dotting tool
- Clear top coat
Mastering the Black and Gold Contrast
The key to stunning reputation era nails lies in creating a flawless black and gold contrast. Start with a smooth black base, ensuring even coverage with two thin coats. Once dry, use a thin brush to add intricate gold details that capture the snake motif central to the Reputation era aesthetic.
| Design Element | Technique | Difficulty Level |
|---|---|---|
| Snake Scales | Gold semicircle overlapping pattern | Intermediate |
| Snake Silhouette | Thin gold line on accent nail | Advanced |
| Gold Accents | Metallic foil or polish details | Beginner |
Pro tip: Use a rich, metallic gold that stands out against the black background. Apply a glossy top coat to enhance the dramatic contrast and protect your intricate design. Remember, the goal is to capture the bold spirit of the Reputation era.
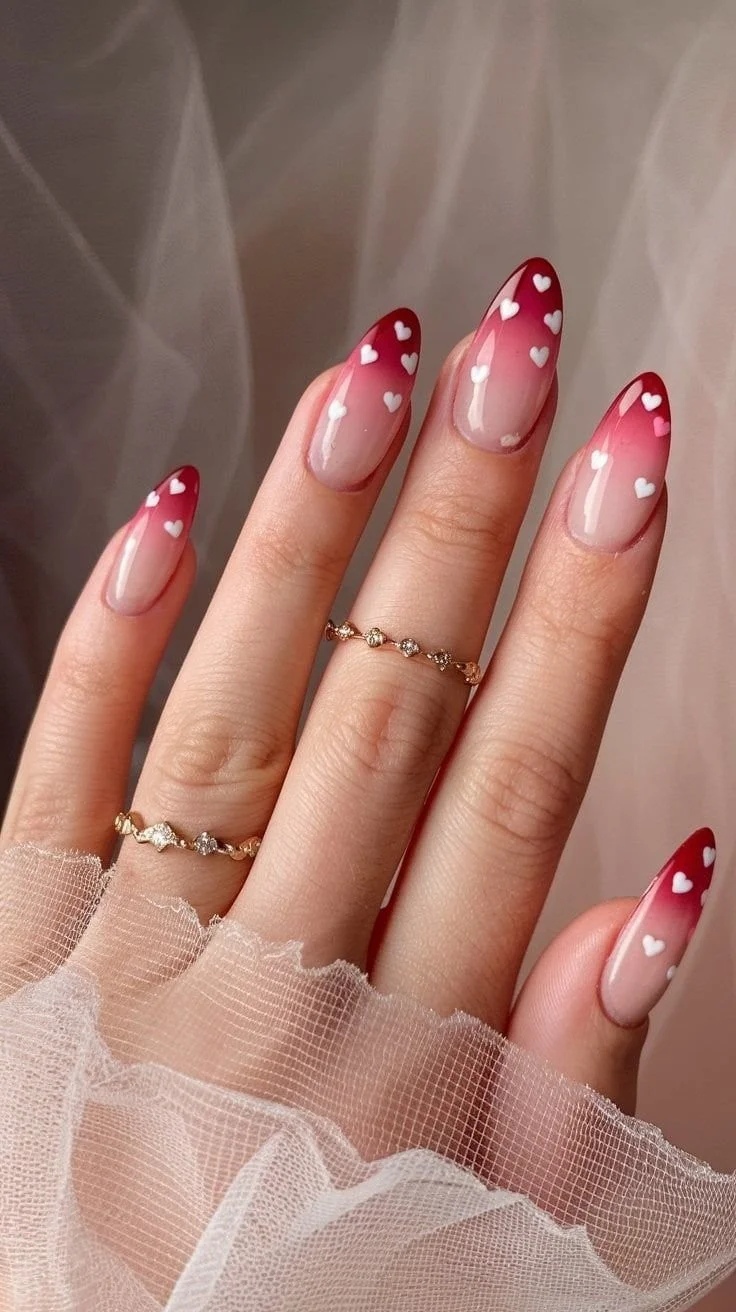
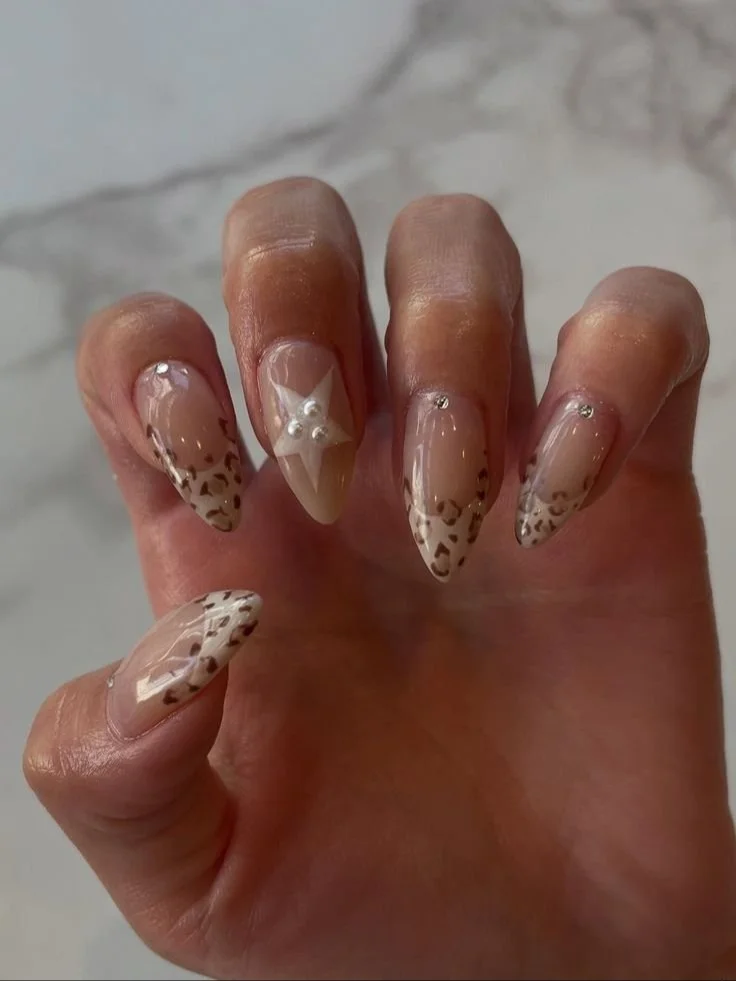
Lover Album Inspired Nails: Pastel Rainbow Hearts
Transform your nails into a dreamy Taylor Swift Lover album-inspired masterpiece with these stunning pastel rainbow heart designs. The Lover era celebrates soft, romantic aesthetics that you can easily recreate with a few simple techniques and some creative nail art skills.
Start by selecting your pastel color palette. The lover album inspired nails typically feature a soft blend of colors including:
- Baby pink
- Lavender
- Pale blue
- Peach
- Soft yellow
Creating the perfect heart design requires precision and patience. You have two primary methods for adding heart details to your lover album inspired nails:
- Dotting tool technique: Create two dots side by side and drag polish downward
- Thin brush method: Paint small hearts freehand with delicate strokes
| Nail Base Color | Heart Accent Color | Design Complexity |
|---|---|---|
| Soft Pink | White | Beginner |
| Lavender | Dark Pink | Intermediate |
| Baby Blue | Peach | Advanced |
Pro tip: Use a cream finish polish for your base and add a subtle iridescent top coat to capture the ethereal Lover album aesthetic. This will give your nails a dreamy, romantic look that truly captures Taylor Swift’s vision.
“Nail art is a form of self-expression, just like music” – Taylor Swift (paraphrased)
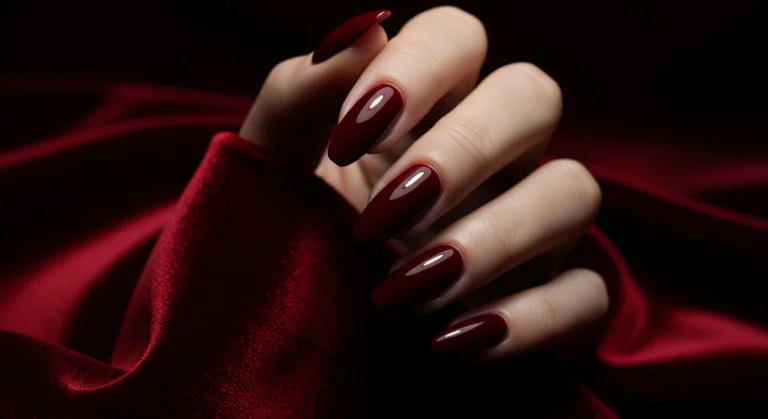
Red Album Nail Designs: Classic Crimson with Gold Accents
Taylor Swift’s Red album represents a passionate era of bold expression, and your nail art can capture this iconic aesthetic perfectly. Red album nail designs blend timeless elegance with dramatic flair, allowing fans to showcase their love for Swift’s musical journey through a stunning manicure.

Achieving the Perfect Red Shade
Selecting the right red is crucial for authentic red album nail designs. Look for a true crimson shade with blue undertones that reflects the album’s emotional depth. Professional nail artists recommend following these application tips:
- Start with a white base coat to enhance color vibrancy
- Use thin, multiple coats for smooth coverage
- Choose high-quality polish with excellent pigmentation
- Test different red formulas before final application
Adding Shimmer and Sparkle Details
Elevate your red album nail designs by incorporating luxurious gold accents. These metallic touches bring sophistication and visual interest to your manicure.
| Gold Accent Technique | Difficulty Level | Visual Impact |
|---|---|---|
| Gold French tips | Intermediate | High |
| Gold glitter accent nail | Easy | Medium |
| Thin gold striping | Advanced | Very High |
Complete your red album nail designs with a high-gloss topcoat to seal the design and create a stunning, jewelry-like finish that captures the album’s romantic essence.
Fearless Nail Inspiration: Golden Glitter and Sparkle
Dive into the magical world of fearless nail inspiration with dazzling golden designs that capture the essence of Taylor Swift’s Fearless era. Your nails can become a sparkling canvas that tells a story of youthful dreams and romantic adventures.
Creating the perfect golden glitter manicure requires some strategic techniques. Start by selecting the right shades of gold that complement your skin tone. Champagne gold offers a subtle shimmer, while deep yellow-gold provides bold glamour.
- Choose between full-coverage glitter or accent nails
- Experiment with gradient glitter effects
- Mix different gold tones for depth and dimension
For a professional finish, try the sponging technique. Dab glitter polish with a makeup sponge to achieve dense coverage without visible brush strokes. This method ensures your fearless nail inspiration looks smooth and professional.
“Glitter is not just a polish, it’s an attitude” – Nail Art Enthusiast
Pro tip: Always use multiple layers of top coat to seal your glittery masterpiece. This prevents chipping and keeps your nails looking fresh and fabulous throughout your musical journey.
Enchanted Nail Looks: Purple and Silver Starry Night

Transform your nails into a magical celestial masterpiece inspired by Taylor Swift’s enchanted nail looks. The Speak Now era’s dreamy purple aesthetic comes alive through a stunning galaxy-inspired manicure that captures the essence of starry nights and cosmic wonder.
Creating an enchanted nail look requires precision and creativity. Your goal is to craft a design that tells a story of mystical beauty right at your fingertips.
Creating the Galaxy Effect
Start your enchanted nail looks journey with these key steps:
- Choose a deep purple or navy base coat as your foundation
- Use a makeup sponge to layer lighter purple, violet, and soft pink tones
- Blend colors gently to create depth and movement
- Add silver or white highlights for cosmic brightness
Placing Stars and Celestial Details
The magic is in the details for your enchanted nail looks. Elevate your galaxy design with these techniques:
- Use a thin brush to create white or silver star dots
- Apply star-shaped glitter for dimensional sparkle
- Incorporate silver rhinestones as featured stars
- Finish with a holographic top coat for an ethereal shine
Pro tip: Balance your star placement to create a natural, magical night sky effect without overcrowding your design.
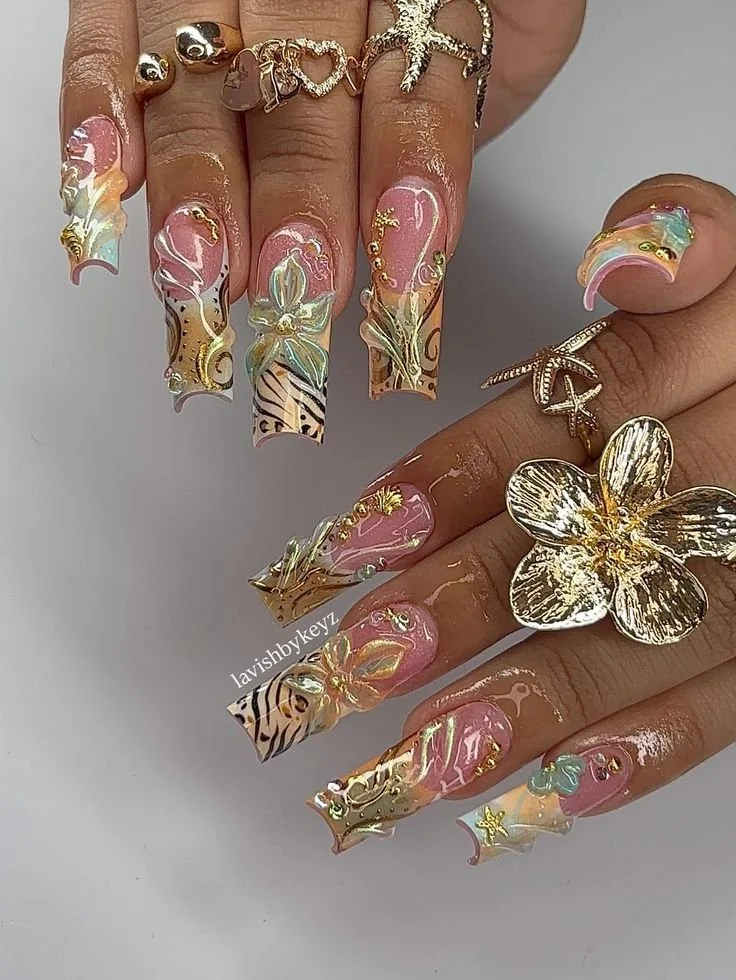
Eras Tour Nail Designs: Mixing Multiple Album Aesthetics
Creating the ultimate eras tour nail designs requires creativity and strategic planning. Your Taylor Swift manicure inspirations can transform a simple nail art into a stunning tribute to her musical journey. The key is blending multiple album aesthetics seamlessly.
Try these exciting techniques for mixing Taylor Swift’s iconic album styles:
- One Era Per Nail: Dedicate each nail to a different album’s unique aesthetic
- Gradient Transitions: Blend colors from different eras smoothly
- Unified Base Color: Use a consistent background to tie different designs together
For an eye-catching Eras Tour nail design, consider these creative approaches:
- Create a timeline effect across your nails showcasing Swift’s musical evolution
- Incorporate signature symbols from different albums
- Use strategic color placement to represent multiple eras
Your nail art can tell a story. Choose accent nails for more intricate designs while keeping others simpler. Mix snake scales from Reputation with pastel hearts from Lover, or blend crimson red with golden sparkles. The goal is a harmonious representation of Taylor Swift’s incredible musical journey.
Pro tip for taylor swift manicure inspirations: Use metallic accents or subtle glitter to create visual cohesion between different era-inspired designs. This technique ensures your eras tour nail designs look intentional and professionally crafted.
Taylor Swift Nails Ideas for Beginners: Simplified Techniques

Diving into swiftie nail art doesn’t have to be intimidating! Even if you’re new to nail design, you can create stunning taylor swift nails ideas with some simple techniques and basic tools. The key is starting small and building your confidence.
For beginners looking to explore taylor swift nails ideas, here are some foolproof approaches:
- Use nail stencils to create clean, professional-looking designs
- Invest in striping tape for precise lines
- Try vinyl guides to help create crisp patterns
- Utilize pre-made stickers and decals for quick album-inspired looks
The Reputation era design can be simplified by using black polish and gold nail tape. For the Lover album, heart-shaped stickers make creating pastel designs a breeze. Dotting tools or even toothpicks can help you create basic heart shapes with minimal artistic skill.
Pro tips for beginners in swiftie nail art:
- Use a cleanup brush to fix minor mistakes
- Apply quick-dry drops to prevent smudging
- Choose peel-off base coats for easy design removal
- Start with glitter polishes that forgive small imperfections
Remember, your nail art journey is about expressing your love for Taylor Swift’s music. Start simple, practice, and watch your skills improve with each design!
Making Your Swiftie Nail Art Last Longer
Creating sparkly swift-inspired manicures is an art, but making them stay vibrant and chip-free requires some professional techniques. Your Taylor Swift-themed nail designs deserve to shine bright throughout concerts, events, and daily adventures.
Protecting your stunning nail art starts with understanding key preservation strategies that will keep your manicure looking fresh and fabulous.
Top Coat Application Secrets
Nail professionals recommend specific techniques for applying top coat to sparkly swift-inspired manicures:
- Wrap the free edge of each nail to seal polish
- Use a quality fast-drying top coat
- Reapply top coat every 2-3 days for extra protection
- Allow extra drying time for glittery or textured designs
Maintenance Between Manicures
Extend the life of your nail art with these protective habits:
- Wear gloves during household chores
- Apply cuticle oil daily
- Avoid prolonged water exposure in first few hours
- Touch up small chips with matching polish
“Your manicure is a masterpiece – treat it like one!” – Nail Art Pro
Pro tip: When it’s time to remove your swift-inspired manicure, use gentle acetone and soft cotton pads to protect your natural nails.
Common Mistakes to Avoid When Creating Swift-Inspired Manicures

Creating the perfect Taylor Swift manicure inspirations requires more than just creativity. Many nail art enthusiasts make critical errors that can compromise their stunning designs. Understanding these common pitfalls will help you achieve professional-looking results that capture the essence of Swift’s iconic nail styles.
Nail preparation is crucial for any Taylor Swift manicure inspiration. Skipping the base coat is a rookie mistake that leads to several problems:
- Nail staining from dark polishes
- Poor polish adhesion
- Premature chipping of your design
Technique matters significantly when applying nail polish. Avoid these common errors:
- Applying thick polish coats that create:
- Extended drying time
- Unwanted bubbling
- Uneven nail texture
Rushing between layers without proper drying time
Overcrowding your nail with too many design elements
Your taylor swift manicure inspirations can quickly go wrong with improper color selection. Pay attention to:
| Mistake | Consequence | Solution |
|---|---|---|
| Similar color values | Lack of design contrast | Choose complementary colors |
| Mixing incompatible tones | Muddy appearance | Stick to cohesive color families |
Professional cleanup is the final touch for impeccable Taylor Swift manicure inspirations. Use a fine brush with acetone to remove polish from surrounding skin, ensuring a clean and polished look that would make any Swiftie proud.
Matching Your Taylor Swift Manicure to Concert Outfits
Creating the perfect Eras Tour nail designs is about more than just stunning artwork—it’s about crafting a complete visual experience. Your manicure can transform your concert ensemble from ordinary to extraordinary, telling a vibrant story of Taylor Swift’s musical journey.
When planning your Eras Tour look, consider these strategic nail and outfit pairing approaches:
- Complementary Design: Match your nail art directly with your outfit’s era and aesthetic
- Contrasting Style: Select nail designs that create visual intrigue against your clothing
- Accent Coordination: Use subtle nail details that echo your outfit’s color palette
For a Lover era outfit featuring pastel colors, incorporate rainbow heart designs that mirror the album’s playful spirit. If you’re wearing a dramatic black ensemble, dramatic Reputation-inspired black and gold nails will create a stunning contrast.
Pro tips for eras tour nail designs that photograph beautifully:
- Choose bold, glittery designs with simple outfits
- Select understated nail art for complex, sequined clothing
- Consider metallic accessories when selecting nail colors
- Use nail stickers or press-on gems for quick era-specific accents
Remember, your nail art is an extension of your concert persona—make it uniquely you!
Conclusion
Your journey through Taylor Swift nails ideas doesn’t end here—it’s just beginning. From the dark and edgy Reputation era to the dreamy Lover pastel hearts, these nail art designs offer a unique way to express your love for Taylor Swift’s musical evolution. Each design represents more than just a trend; it’s a personal statement that connects you to the vibrant Swiftie community.
The techniques and supplies you’ve learned make creating stunning swiftie nail art accessible to everyone, regardless of your artistic skill level. Whether you’re preparing for the Eras Tour or want to showcase your fandom in daily life, these nail designs provide a creative canvas to celebrate Taylor’s artistry. Remember that nail art is temporary and fun—perfect for experimenting with different styles and expressing your musical passion.
Don’t be afraid to put your own spin on these Taylor Swift nails ideas. Mix colors, play with techniques, and most importantly, enjoy the creative process. Share your nail art creations on social media, connect with fellow fans, and wear your Swiftie pride with confidence. Your nails can be a beautiful, wearable tribute to the music and artistry that inspires you.
Embrace your creativity, have fun, and let your nails tell your Taylor Swift story—one design at a time.
FAQ
What nail polish colors work best for Taylor Swift-inspired designs?
For Taylor Swift-inspired nail art, you’ll want to collect specific colors from each era. Reputation requires deep black polish, Lover needs pastel shades like pink, blue, and lavender, Red calls for crimson reds, Fearless works with champagne and gold glitters, and Enchanted uses deep purple with silver accents.
Do I need professional nail art skills to create these designs?
Not at all! These Taylor Swift-inspired nail designs are beginner-friendly. You can use tools like dotting tools, nail stickers, striping tape, and stencils to help you create professional-looking designs without advanced painting skills. Start simple and gradually build your confidence.
How long will these nail designs typically last?
With proper application and maintenance, your Taylor Swift-inspired manicure can last 7-10 days. Use a quality base coat, apply thin layers of polish, seal with a top coat, and reapply top coat every 2-3 days to maintain shine and prevent chipping.
What essential tools do I need for Swift-inspired nail art?
You’ll want to have base and top coats, nail polish in various colors, dotting tools, thin striping brushes, nail art pens, small rhinestones, nail tape, a cleanup brush with acetone, and optional extras like glitter polishes and nail stickers.
Can I mix different Taylor Swift era designs in one manicure?
Absolutely! The Eras Tour Nail Design approach allows you to combine multiple album aesthetics. You can do one era per nail or create gradient effects that blend different era colors and motifs for a unique, personalized look.
How do I prevent my nail art from chipping quickly?
Prevent chipping by properly preparing your nails, using a base coat, applying thin polish layers, wrapping the polish tips, using a quality top coat, and avoiding prolonged water exposure in the first few hours after application. Wearing gloves during household chores also helps protect your manicure.
Are these nail designs suitable for the Eras Tour concert?
These designs are perfect for the Eras Tour! They allow you to showcase your favorite Taylor Swift album aesthetics, coordinate with your concert outfit, and connect with other Swifties through creative nail art that celebrates her musical journey.