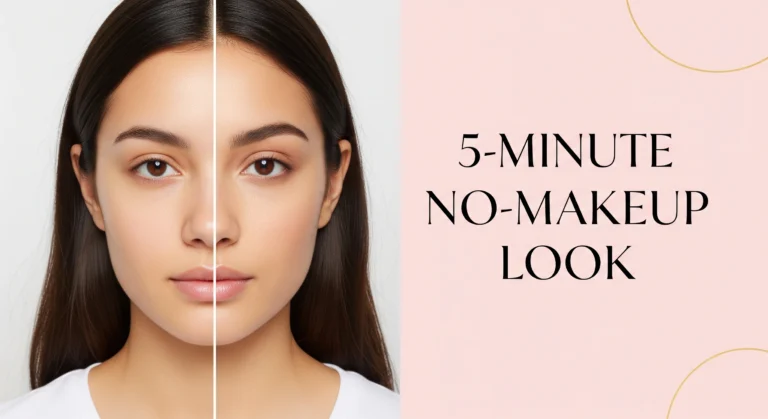
Cloud Skin Tutorial: 5-Minute No-Makeup Look That Glows
Introduction Did you know that 67% of women spend more than 20 minutes on their morning makeup routine, but what if I told you that you could achieve a flawless, natural look in just 5 minutes? The cloud skin tutorial trend is revolutionizing how we approach everyday makeup, offering a breathable, luminous finish that looks…
Introduction
Did you know that 67% of women spend more than 20 minutes on their morning makeup routine, but what if I told you that you could achieve a flawless, natural look in just 5 minutes? The cloud skin tutorial trend is revolutionizing how we approach everyday makeup, offering a breathable, luminous finish that looks like you woke up with perfect skin.
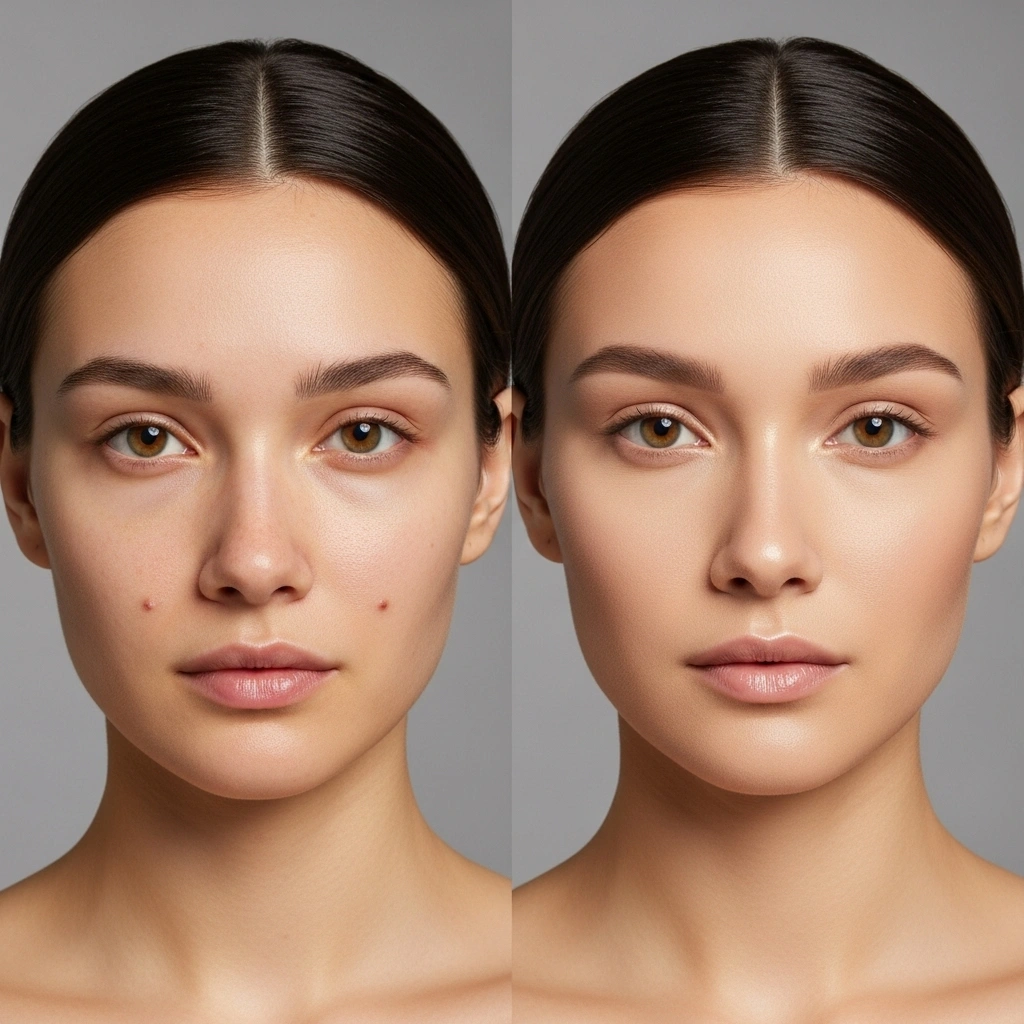
This cloud skin tutorial focuses on creating an effortless beauty look that mimics the appearance of naturally radiant, healthy skin. Unlike traditional full-coverage makeup routines, this natural makeup tutorial emphasizes enhancing your skin’s inherent beauty rather than masking it. Perfect for those hectic mornings when you’re rushing out the door but still want to look polished and put-together.
The beauty of this minimal makeup look lies in its versatility and time efficiency. Whether you’re heading to a morning meeting, dropping kids at school, or simply want to look refreshed for video calls, this quick makeup tips approach delivers professional results without the time investment. You’ll learn how to create that coveted “your skin but better” effect that’s become the holy grail of modern beauty routines.
What You’ll Need for This Look
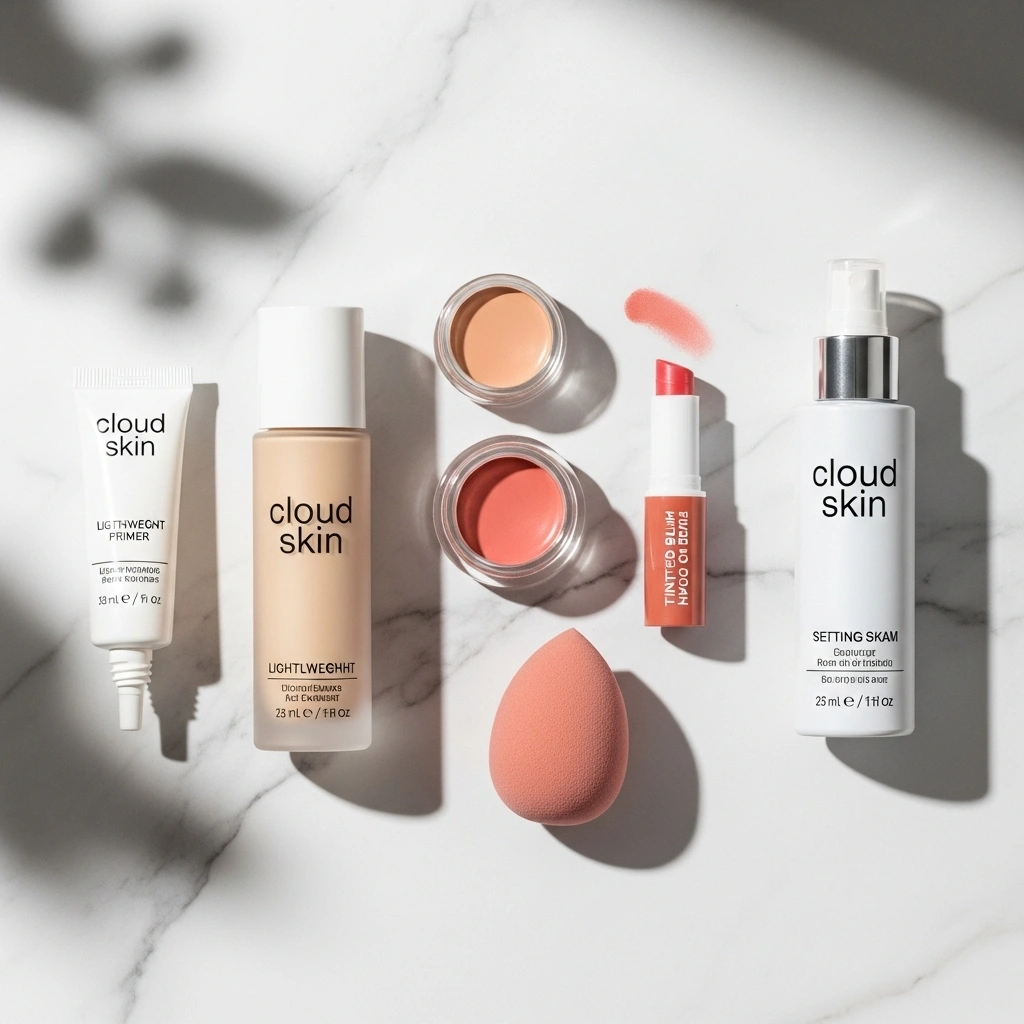
Creating the perfect cloud skin requires the right combination of lightweight, skin-loving products. Here’s your complete shopping list for achieving this effortless beauty look:
Base Products:
- A lightweight, breathable foundation or tinted moisturizer that feels like second skin (Drugstore option: L’Oréal True Match Tinted Serum; High-end: Giorgio Armani Luminous Silk Foundation)
- Hydrating primer with light-reflecting particles for that natural glow
- Color-correcting concealer in your exact shade match
- Setting powder that adds luminosity rather than mattifying
Color Products:
- Cream blush that melts seamlessly into your complexion (think peachy-pink or soft coral tones)
- Tinted lip balm or lip stain for natural-looking color
- Clear or tinted brow gel for groomed, feathery brows
- Cream highlighter for subtle luminosity
Essential Tools:
- Damp beauty sponge for seamless blending
- Small fluffy brush for powder application
- Angled brush for brow grooming
- Clean fingers (seriously, they’re your best tool for cream products!)
Pro Alternatives: If you’re missing any products, don’t worry! Cream eyeshadow can double as blush, lipstick can work as cream blush when applied sparingly, and even a small amount of face oil can create that dewy highlight effect.
Time Investment: Why This Works for Your Schedule
This cloud skin tutorial is designed for real life, not Instagram perfection. Here’s exactly how those precious five minutes break down:
Preparation: 1 minute
- Cleanse hands and gather products
- Apply a thin layer of hydrating primer
- Let primer set while organizing your tools
Base Makeup: 2 minutes
- Apply foundation/tinted moisturizer with damp sponge
- Spot-conceal only where needed
- Light dusting of setting powder in T-zone
Color Application: 2 minutes
- Cream blush applied and blended
- Quick brow grooming with tinted gel
- Tinted lip balm application
- Subtle cream highlight on high points
Compared to the average 20-minute routine, this everyday makeup routine saves you 75% of your morning prep time. That’s an extra 15 minutes for coffee, meditation, or simply not rushing out the door in a panic.
This timing works perfectly for morning video calls (you’ll look awake and polished), school drop-offs, grocery runs, or any situation where you want to look effortlessly put-together without the time investment of a full makeup routine.
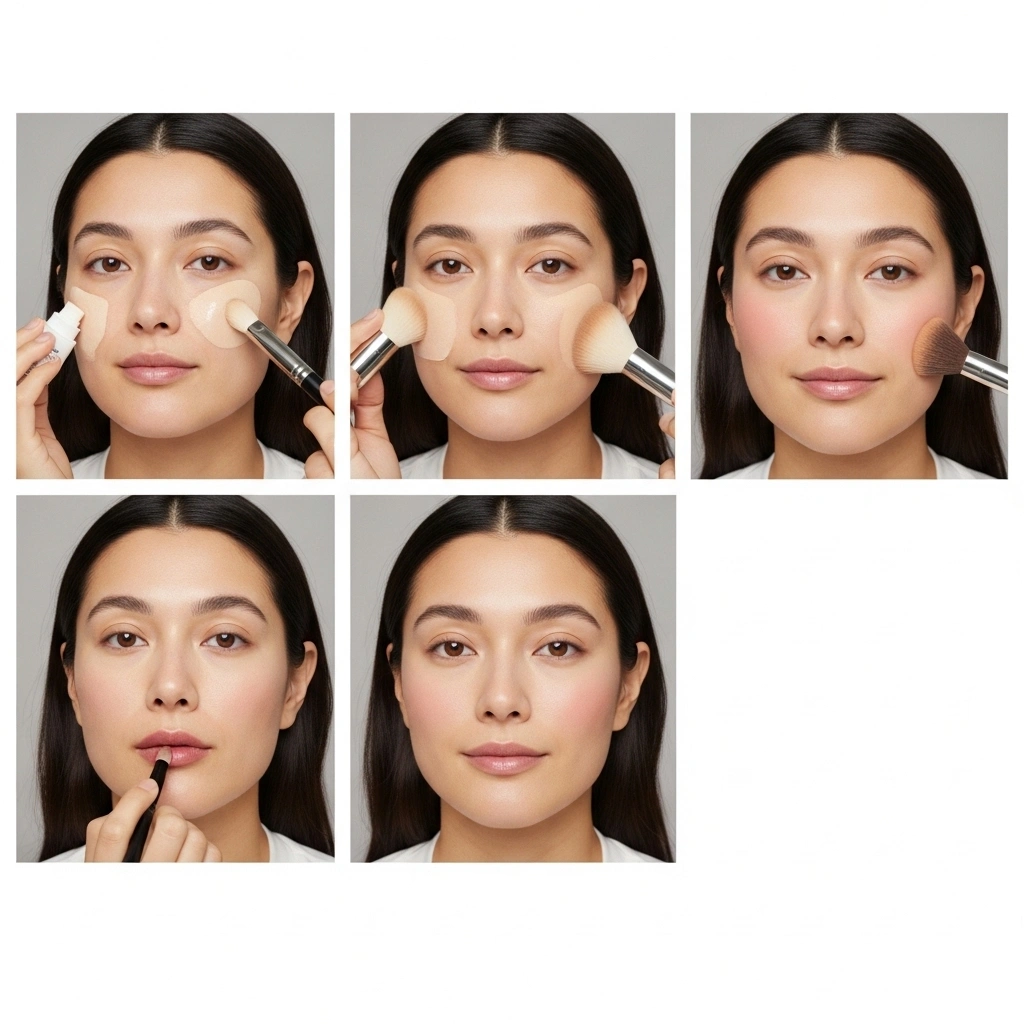
Step 1: Prepping Your Canvas (30 seconds)
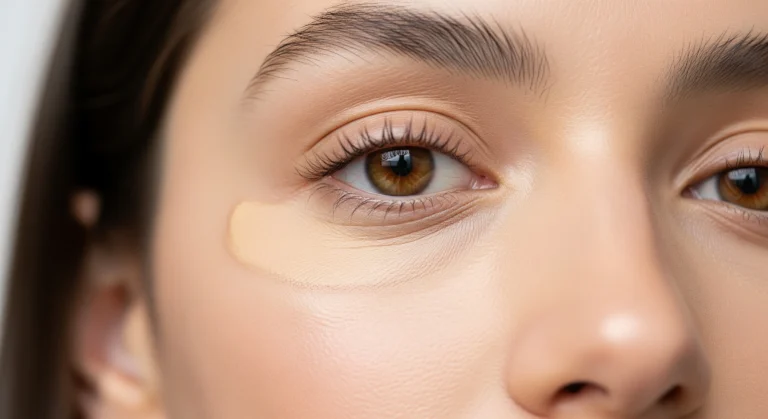
Start with clean, moisturized skin – this is non-negotiable for achieving authentic cloud skin. Apply your hydrating primer using gentle patting motions, focusing on areas where makeup typically fades first: around the nose, chin, and forehead.
Pro tip: If your skin is particularly dry, mix a drop of facial oil with your primer for extra luminosity. For oily skin types, use a mattifying primer only in your T-zone while keeping the hydrating formula on your cheeks.
Common mistake to avoid: Don’t rub the primer in harshly. Patting motions preserve your skin’s natural texture and prevent the primer from pilling, which can create an uneven base for your foundation.
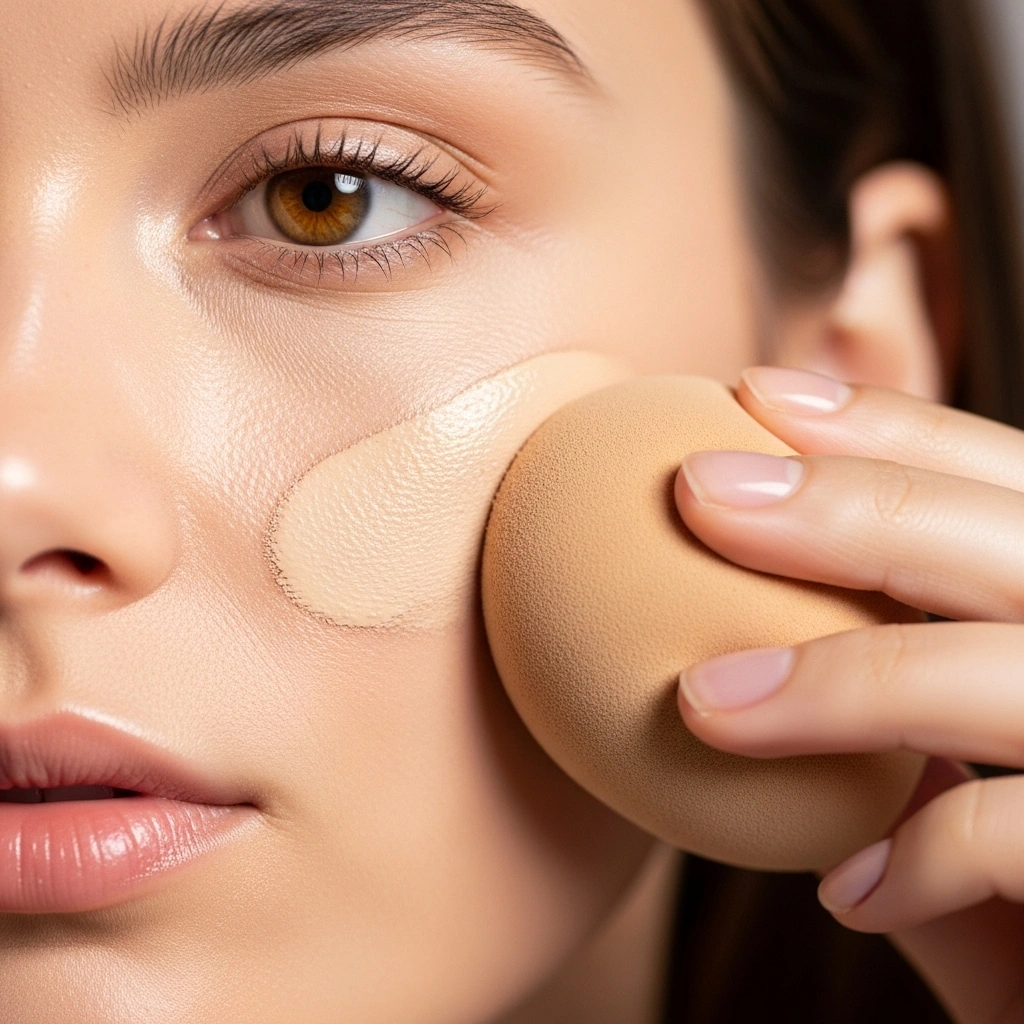
Step 2: Creating an Even Base (1 minute)
This is where the magic happens in your cloud skin tutorial. Apply your lightweight foundation or tinted moisturizer using a damp beauty sponge in gentle pressing motions. Start from the center of your face and blend outward, using the pointed end of the sponge for detailed areas around the nose and eyes.
The goal isn’t full coverage – you want your natural skin to show through. Think of this step as evening out your skin tone rather than covering it completely. Use only enough product to address redness or discoloration while maintaining your skin’s natural texture.
For different skin types:
- Dry skin: Use a hydrating foundation and blend with slightly more moisture on your sponge
- Oily skin: Opt for a matte tinted moisturizer and use a barely damp sponge
- Combination skin: Apply lighter coverage on oily areas and build up slightly on dry patches
Spot-conceal only obvious blemishes or under-eye circles, using a shade that matches your skin exactly. The key is strategic concealing rather than blanket coverage.
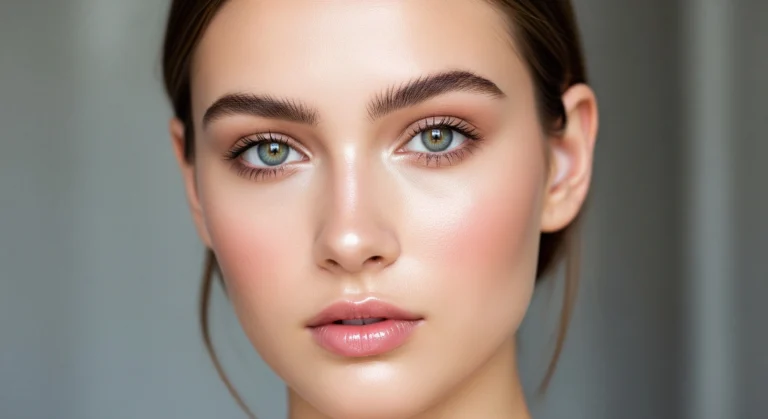
Step 3: Adding Natural Color (1.5 minutes)
Cream blush is your secret weapon for authentic-looking color that appears to come from within. Choose a shade that mimics your natural flush – typically peachy-pink for warm undertones or rosy-pink for cool undertones.
Apply cream blush to the apples of your cheeks using your fingers, then blend upward toward your temples. The warmth of your skin will help the product melt seamlessly into your base. Don’t be afraid to build gradually – you can always add more, but it’s harder to take away.
Pro technique: Smile naturally to locate the apples of your cheeks, then apply blush slightly higher than where you might typically place powder blush. This creates a more youthful, lifted appearance.
Alternative methods: If you prefer brushes, use a small, dense synthetic brush for cream products. Work quickly as cream formulas set faster than powders.
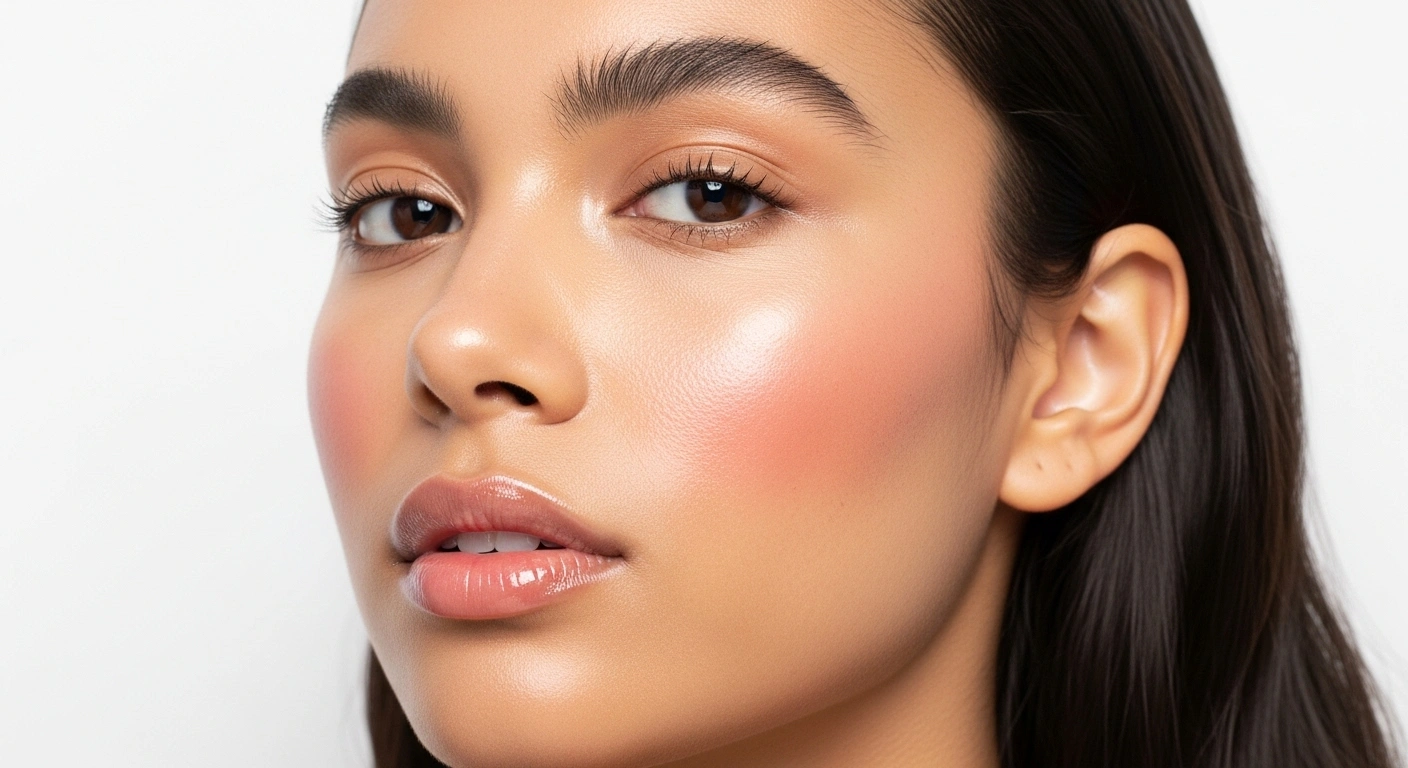
Step 4: Defining Your Features (1.5 minutes)
Cloud skin is all about subtle definition that enhances rather than dramatically alters your features. Start with your brows – use tinted brow gel to groom hairs upward and outward, creating that feathery, natural texture that’s so popular right now.
Apply tinted lip balm or lip stain for effortless color that won’t require constant touch-ups throughout the day. Choose a shade just one or two tones deeper than your natural lip color.
Finish with cream highlighter applied sparingly to the high points of your face: cheekbones, bridge of the nose, and cupid’s bow. The key is subtlety – you want to look naturally luminous, not artificially shiny.
Skin tone considerations:
- Fair skin: Opt for champagne or pearl-toned highlights
- Medium skin: Golden or peachy highlights work beautifully
- Deep skin: Bronze or copper tones create the most natural glow
Step 5: Setting Your Look (30 seconds)
The final step in your cloud skin tutorial involves strategic setting that maintains your dewy finish while ensuring longevity. Use a light-reflecting setting powder only where you tend to get oily throughout the day – typically the T-zone.
Apply with a fluffy brush using gentle pressing motions rather than sweeping, which can disturb your carefully blended base. Skip powder entirely on the high points where you applied highlighter to maintain that natural luminosity.
Pro tip: If you accidentally over-powder and lose that dewy finish, gently press a damp beauty sponge over your skin to revive the natural glow.
How This Look Actually Benefits Your Skin
Beyond the time-saving advantages, this cloud skin approach offers genuine skincare benefits that traditional full-coverage makeup simply can’t match:
• Allows skin to breathe naturally – Lightweight formulas don’t clog pores or interfere with your skin’s natural renewal process • Reduces risk of clogged pores – Minimal product buildup means fewer opportunities for pore blockage • Maintains natural moisture barrier – Hydrating formulas support your skin’s protective barrier rather than stripping it • Encourages better skin health – When you’re not covering everything, you’re more motivated to maintain good skincare habits • Provides gentle sun protection – Many tinted moisturizers include SPF for daily UV defense
Research shows that heavy makeup can disrupt the skin’s microbiome, leading to increased sensitivity and breakouts. This minimal makeup routine supports your skin’s natural balance while still providing the confidence boost of looking polished and put-together.
The breathable formulas used in cloud skin tutorials often contain skin-loving ingredients like hyaluronic acid, vitamin E, and peptides that actively benefit your complexion throughout the day.
Adapting This Look: From Coffee Run to Client Call
The beauty of mastering this natural makeup tutorial lies in its adaptability. Here’s how to modify your cloud skin for different occasions:
Ultra-Minimal Version (2 minutes) – Perfect for gym, errands, or casual weekends:
- Tinted moisturizer with SPF only
- Cream blush
- Tinted lip balm
- Quick brow gel application
Elevated Version (7 minutes) – Ideal for work video calls or lunch meetings:
- Add cream eyeshadow in a neutral tone
- Define lashes with one coat of brown mascara
- Slightly more coverage with concealer
- Set with translucent powder
Enhanced Version (10 minutes) – Great for casual dinner dates or social events:
- Include cream eyeshadow and subtle eyeliner
- Add a second blush tone for dimension
- Use a slightly bolder lip color
- Contour lightly with cream bronzer
Seasonal Adaptations:
- Summer: Focus on waterproof formulas and extra SPF protection
- Fall: Incorporate warmer blush tones like burnt orange or deep rose
- Winter: Add extra hydration and switch to slightly deeper lip colors
- Spring: Embrace fresh, bright colors and lightweight textures
Complete the Look: Hair and Outfit Pairings
Your effortless beauty look deserves equally effortless styling to complete the cloud skin aesthetic:
Complementary Hairstyles:
- Messy low bun with face-framing pieces
- Sleek middle-part ponytail
- Natural air-dried waves
- Half-up topknot with textured ends
Outfit Styles That Pair Perfectly:
- Minimalist basics in neutral tones
- Flowy blouses with tailored bottoms
- Cozy knits and well-fitted jeans
- Crisp white shirts with statement accessories
Jewelry and Accessory Suggestions:
- Delicate gold or silver jewelry
- Simple stud earrings or small hoops
- Minimal watches or thin bracelets
- Soft scarves in complementary tones
Photography Tips for This Look:
- Natural lighting always works best with cloud skin
- Avoid flash photography which can wash out the subtle luminosity
- Angle your face toward a window for the most flattering light
- Keep editing minimal to preserve the natural finish
5 Ways to Ruin Your No-Makeup Makeup Look
Even the simplest techniques can go wrong without proper execution. Here are the most common pitfalls and how to avoid them:
1. Over-blending Foundation The mistake: Working foundation too long until it disappears or becomes patchy. The fix: Use gentle pressing motions and stop blending once the product is evenly distributed.
2. Choosing Wrong Undertones The mistake: Using products that don’t match your skin’s natural undertones. The fix: Test products on your jawline in natural light, not your wrist or hand.
3. Skipping Primer with Minimal Makeup The mistake: Thinking you don’t need primer with lightweight products. The fix: Primer creates the perfect base for even minimal makeup and extends wear time.
4. Using Too Much Product The mistake: Applying the same amount of product you’d use for full coverage. The fix: Start with half the amount you think you need – you can always build coverage gradually.
5. Not Blending Properly The mistake: Harsh lines between makeup and bare skin, especially with cream products. The fix: Take extra time to blend edges seamlessly, using gentle circular motions.
Industry data shows that 43% of makeup mistakes occur during the blending process, making this the most critical skill to master for successful cloud skin application.

Making Your 5-Minute Look Last All Day
Longevity is crucial when you’re investing minimal time in your morning routine. Here’s how to ensure your cloud skin stays fresh from morning until evening:
Setting Strategy:
- Use setting spray before and after makeup application
- Focus powder only on areas prone to oiliness
- Blot excess oil with blotting papers rather than adding more powder
Touch-Up Kit Essentials:
- Cream blush in a small compact
- Tinted lip balm
- Blotting papers
- Small powder compact for T-zone only
Climate Considerations:
- Humid weather: Use waterproof formulas and extra setting powder
- Dry climates: Add facial mist to your touch-up routine
- Air conditioning: Keep a hydrating mist nearby to refresh skin
- Outdoor activities: Reapply SPF and use cream products that won’t cake
Time-of-Day Touch-Ups:
- Midday: Blot T-zone and refresh lips
- Afternoon: Add a light mist and gentle blush reapplication
- Evening transition: Deepen lip color and add subtle eye definition
Your New Go-To Morning Routine
This cloud skin tutorial transforms your morning routine by delivering professional-looking results in just five minutes. You’ll achieve that coveted natural glow while actually benefiting your skin’s health, all while saving precious time in your busy schedule.
The minimal makeup look you’ve learned isn’t just a trend – it’s a sustainable approach to beauty that works with your natural features rather than against them. By focusing on skin health and strategic enhancement, you’re creating a routine that grows more effective over time as your skin improves.
Ready to revolutionize your mornings? Try this cloud skin tutorial tomorrow and experience the confidence that comes from looking effortlessly radiant. Drop a comment below with your results, subscribe for more time-saving beauty tips, and share your before/after photos on Instagram – tag me @yourusername! Your future self will thank you for those extra 15 minutes and the compliments you’ll receive on your natural glow.
Your No-Makeup Makeup Questions, Answered
Will this look work on mature skin? Absolutely! Cloud skin is particularly flattering on mature skin because it focuses on hydration and luminosity rather than heavy coverage. The key is using products with light-reflecting particles and avoiding matte formulas that can emphasize fine lines. Consider adding a primer with peptides for extra anti-aging benefits.
Can I use this technique with acne-prone skin? Yes, but choose non-comedogenic formulas and focus on strategic concealing rather than full coverage. The lightweight approach actually benefits acne-prone skin by reducing pore-clogging buildup. Look for products with salicylic acid or niacinamide for added skincare benefits.
What if I don’t have all these products? Start with what you have! The core of cloud skin is about technique, not specific products. You can create a natural glow with just tinted moisturizer, a cream blush (or lipstick used sparingly), and lip balm. Build your collection gradually as you perfect the technique.
How do I make this look more dramatic for evening? Add depth gradually: deepen your blush, add a subtle eyeshadow, include mascara, and use a bolder lip color. The key is maintaining the natural finish while adding intensity through color rather than coverage.
What’s the difference between this and a full makeup routine? Cloud skin focuses on enhancing your natural features with minimal products, while traditional makeup often involves color correction, contouring, and dramatic enhancement. This approach takes 75% less time and uses 60% fewer products while still creating a polished appearance.
Can men try this technique too? Definitely! Many of these techniques work beautifully for men who want to look groomed and refreshed. Focus on tinted moisturizer, subtle concealing, and brow grooming. The natural approach is perfect for professional settings or special occasions.
How do I choose the right shade for my skin tone? Test products on your jawline in natural light, preferably near a window during daytime hours. The right shade should disappear into your skin seamlessly. When in doubt, choose a shade slightly lighter than you think you need – you can always build coverage or add bronzer for warmth.